Key takeaways
- Standard ceilings: A 13-to-50-inch adjustable microfiber duster is usually enough when used from a stable position.
- Tall ceilings: A 6-foot or longer extension can reduce ladder use, but work slowly and check that the head stays secure.
- Multiple surfaces: Choose a removable, washable pad so the tool can clean blinds, molding, shelves, and door tops without needing several separate gadgets.
What's inside
A ceiling fan can quietly collect a surprising amount of dust, especially along its upper blade surfaces where it is easy to miss. When the fan turns, that buildup can scatter back into the room, settle on furniture, and aggravate allergies. Cleaning it regularly also helps keep the fan looking cared for without turning a simple chore into a ladder-balancing exercise.
This guide explains the safest, least-messy way to clean a ceiling fan, with advice for compact homes, tall rooms, and fans positioned above beds or tightly arranged furniture. You’ll learn which tools are worth buying, how to control falling dust, and when a deeper clean is necessary.
As an Amazon Associate we earn from qualifying purchases.



Recommended Picks
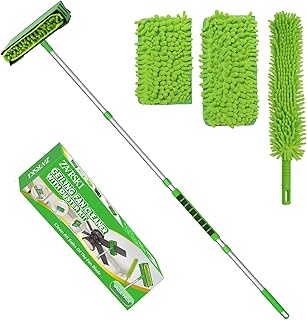
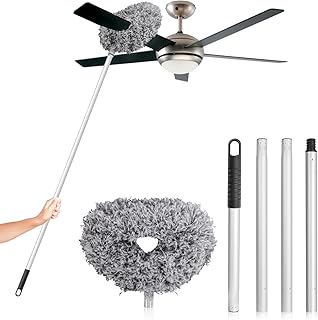
For most homes, a washable microfiber duster with an adjustable pole is the most practical choice. The DRQ Ceiling Fan Cleaner Duster reaches from 13 to 48 inches and has a removable microfiber head, making it useful for fans as well as bookcases, doors, and high shelves. The similar FONUNO Ceiling Fan Duster extends to 50 inches and is a sensible option if you want one compact tool for several above-eye-level jobs.
If your ceiling is higher or your furniture layout makes repositioning difficult, consider the Ceiling Fan Cleaner Duster with 6 Ft/72” Extension Pole. For a comparable mid-length option, the SetSail Ceiling Fan Cleaner Duster offers a washable head and a 13-to-48-inch range. Homes with especially tall ceilings may benefit from the LAANPOLE 26FT Reach Ceiling Fan Cleaner Duster, though long poles require more control and storage space. The Ceiling Fan Cleaner Duster with 13-to-49.7-Inch Pole is another useful size for standard rooms and small-space storage.
1. Turn Off the Fan and Prepare the Room
Switch the fan off at the wall control and, if you will be touching the fixture or removing parts, turn off power at the circuit breaker. Wait until the blades have stopped completely. Do not rely on a remote control alone if you plan to wipe the motor housing, light kit, or other electrical components.
Clear the area directly below the fan. In a small room, move chairs, baskets, and lightweight tables rather than trying to clean around them. Cover a bed, sofa, or dining table with a sheet or clean drop cloth. A pillowcase placed over each blade can also catch loose dust, but it is more effective for light buildup than for thick, greasy residue.
2. Choose a Tool That Matches Your Ceiling
Measure the approximate distance from the floor to the lowest part of the fan, then choose a pole that lets you reach comfortably without stretching. A tool that is too short encourages awkward pressure and makes it harder to keep the duster aligned with the blade. A very long pole can flex, swing into walls, or be difficult to store in a small apartment.
- Standard ceilings: A 13-to-50-inch adjustable microfiber duster is usually enough when used from a stable position.
- Tall ceilings: A 6-foot or longer extension can reduce ladder use, but work slowly and check that the head stays secure.
- Multiple surfaces: Choose a removable, washable pad so the tool can clean blinds, molding, shelves, and door tops without needing several separate gadgets.
3. Clean the Blades Without Spreading Dust
Begin with the upper surface of the blade closest to you. Place the microfiber head over the blade rather than dragging a flat cloth across it. Use gentle, controlled strokes from the center toward the tip, supporting the blade with the duster rather than pressing hard. Excessive force can flex the blade or put stress on the fan assembly.
Work around the fan one blade at a time. Keep the duster head in contact with the blade as you pull it back; lifting it abruptly can release the dust you have just collected. If the head becomes visibly loaded, pause and shake it outdoors or replace the washable pad. Avoid using a feather duster, which tends to redistribute fine particles around the room.
4. Wipe the Housing, Hardware, and Light Kit Carefully
Once the blades are clean, use a dry or barely damp microfiber cloth on the motor housing, downrod, canopy, and pull chains. Never spray cleaner directly onto the fan. Spray a small amount onto the cloth instead, keeping moisture away from vents, switches, sockets, and electrical connections.
For a glass light cover, remove it only if the manufacturer’s instructions allow it and you can support it securely. Wash removable glass with mild dish soap, dry it fully, and reinstall it carefully. Do not use abrasive sponges on painted blades or decorative finishes. If the fan has wobbling, unusual noise, exposed wiring, or a loose mounting plate, stop cleaning and arrange a repair.
5. Finish With a Floor-Level Reset
After cleaning, inspect the floor and nearby surfaces with a vacuum fitted with a soft brush or a microfiber cloth. This final pass matters in compact rooms because dust has fewer places to disperse and may settle immediately on visible surfaces. Wash reusable duster pads according to their care instructions, preferably without fabric softener, which can reduce microfiber’s ability to capture dust.
Tips
- Clean ceiling fans before vacuuming or dusting the rest of the room.
- Use a stable step stool only when necessary; never stand on a chair, bed, or rolling furniture.
- Clean one fan every few weeks during heavy-use seasons, and more often in dusty or allergy-sensitive homes.
- Store an adjustable duster vertically in a closet or behind a door, with the head removed if it saves space.
Frequently Asked Questions
How often should I clean a ceiling fan?
For an actively used fan, every two to four weeks is a reasonable starting point. Clean more often if you have pets, construction nearby, open windows, or household members sensitive to dust. A quick inspection of the blade edges will tell you whether your schedule is sufficient.
Should I clean a ceiling fan wet or dry?
Start dry with a microfiber duster to capture loose particles. Use a slightly damp cloth only for residue that remains afterward. Keep moisture away from electrical parts, and never spray cleaner directly on the fan.
Can I use a vacuum cleaner on the blades?
Yes, a vacuum with a soft brush attachment can work, particularly for light dust. Keep the nozzle from striking the blades, and use low suction if the blades flex. A blade-covering microfiber duster is often easier for reaching across the full surface without scratching.
What should I do if the fan is above a bed or table?
Cover the surface first and choose a duster with enough reach to keep both feet on the floor. Clean slowly from the outside of the room toward the fan, then vacuum any particles that land on the covering before removing it.
Conclusion
The best way to clean a ceiling fan is to work with the power off, contain dust before it falls, and use a washable microfiber tool that matches your ceiling height. An adjustable duster can replace a ladder for routine maintenance while also earning its storage space by handling shelves, molding, blinds, and other hard-to-reach areas. Clean gently, avoid excess moisture, and treat any mechanical problem as a repair issue rather than a cleaning task.