Key takeaways
- Foam tape: Best for narrow, irregular gaps between the frame, sash, and AC cabinet. It compresses well and is easy to cut.
- Rigid or accordion side panels: Better for broad side openings where thin tape would require several overlapping layers.
- Weather-sealing tape: Useful for covering seams and creating a wider removable barrier, especially on smooth, clean surfaces.
- Fabric window kits: Intended for portable AC exhaust hoses, not for sealing a traditional window-mounted unit.
What's inside
A window air conditioner can cool a room efficiently, but only if the gap around it is sealed. Open spaces beside the unit let warm outdoor air, humidity, dust, and insects back inside—making the room feel less comfortable and forcing the AC to work harder. In a small apartment or compact bedroom, a proper seal also helps reduce drafts and keeps the installation looking more finished.
This guide explains how to seal a window air conditioner without wasting space or creating a permanent mess. You’ll learn how to measure the opening, choose between foam, side panels, and removable tape, install the seal in the right order, and avoid common mistakes that can cause leaks or damage the window.
As an Amazon Associate we earn from qualifying purchases.




Recommended picks
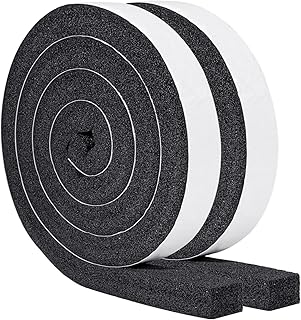
For a complete setup, pair an appropriately sized window unit with materials that match your window style. The BLACK+DECKER 12,000 BTU Window Air Conditioner, BWAC12WTB, is designed for rooms up to 550 square feet and includes a remote, three cooling speeds, and a fan-only mode. For the gaps around a standard window unit, High Density Foam Tape and Yotache’s 1-by-1-inch Air Conditioner Window Seal Kit are practical options because they compress against uneven surfaces.
If the accordion side panels leave large openings, the 2 Pack Window Air Conditioner Side Panels can provide a more substantial barrier. For portable air conditioners, the HOOMEE Universal Window Seal is a different type of solution: its zippered fabric panel is made for a hose passing through a window. SWRT 20 Mil Window Weather Sealing Tape is useful when you need a wider, low-profile exterior or interior strip and want residue-free removal.
1. Measure before buying anything
Close and lock the window as far as the AC installation allows, then measure the exposed gaps on both sides and across the top. Measure at several points; older windows and flexing frames are rarely perfectly square. Record the widest gap, the total length that needs sealing, and the available depth behind the sash.
Leave the manufacturer’s support brackets, drainage path, controls, and ventilation openings unobstructed. Do not seal over a condensate outlet or block the airflow from the front or rear of the unit. If you are replacing an AC, size the cooling capacity for the room rather than choosing the largest model that fits the window.
2. Choose the right sealing material
- Foam tape: Best for narrow, irregular gaps between the frame, sash, and AC cabinet. It compresses well and is easy to cut.
- Rigid or accordion side panels: Better for broad side openings where thin tape would require several overlapping layers.
- Weather-sealing tape: Useful for covering seams and creating a wider removable barrier, especially on smooth, clean surfaces.
- Fabric window kits: Intended for portable AC exhaust hoses, not for sealing a traditional window-mounted unit.
Foam is usually the most space-conscious choice because it adds little bulk. In a rental, prioritize adhesive products described as removable, and test a small hidden area first.
3. Clean and dry the contact surfaces
Remove old foam, dust, grease, and loose paint from the window frame and AC cabinet. Use a mild household cleaner, then wipe with clean water if needed and let everything dry completely. Adhesive will not hold reliably on condensation, dusty vinyl, or a greasy metal surface.
Before exposing the adhesive, hold the material in place and mark the cuts. Cut foam with sharp scissors or a utility knife and make corners meet neatly rather than forcing thick overlaps. A snug joint is more effective than a compressed bundle that pushes the window out of alignment.
4. Install the seal in a controlled order
Install the AC according to its instructions first, confirming that it is level enough for proper drainage and securely supported. Then begin sealing at the top, continue down one side, and finish at the bottom and opposite side. This order keeps the upper edge from becoming a funnel for rainwater and makes it easier to inspect each seam.
Apply foam tape in continuous runs whenever possible. Press firmly along the full length, but do not stretch the foam while installing it; stretched material can shrink and reopen a gap. Extend side panels until they contact the window frame, fastening them without preventing the sash from closing securely.
For exterior-facing tape, press down the edges with a clean, firm tool or your fingertips. Avoid sealing the window permanently if you may need emergency access or seasonal removal. At the end, gently tug each section to check that it is attached without peeling.
5. Check for leaks, noise, and safe operation
Run the AC for 15 to 20 minutes, then inspect the perimeter from indoors. A cool draft or visible light indicates a missed gap. On a windy day, move your hand slowly around the seal to locate air movement. A tissue held near a seam can also reveal a leak, but keep it away from the fan and electrical parts.
Look outside for water collecting where it should not, and confirm that the unit remains stable. Listen for rattling: loose panels often create noise even when they block some air. If the window cannot lock, the unit shifts, or the seal interferes with the support hardware, stop and correct the installation rather than compensating with more tape.
Tips
- Install the seal on a dry day when the frame is close to room temperature; extreme heat can make adhesive soft and difficult to position.
- Keep a narrow access point around screws or brackets so seasonal removal does not destroy the entire seal.
- Replace compressed, brittle, or moldy foam instead of stacking new material over it.
- At the end of cooling season, remove adhesive slowly at a low angle and clean residue with a surface-safe product.
Frequently Asked Questions
Should I seal the inside or outside of a window AC?
Start on the interior, where most drafts enter the room, and use exterior sealing only when the product and window material are suitable. Never cover drainage points, ventilation openings, or moving parts.
What thickness of foam tape works best?
A 1-by-1-inch foam strip is a useful starting point for many window AC gaps, but the correct size depends on the opening. The foam should compress to close the space without forcing the window or panel out of position.
Can I use duct tape instead of AC window seal tape?
Duct tape may hold temporarily, but its adhesive can leave residue and deteriorate in heat or sunlight. Purpose-made foam or weather-sealing tape generally provides a cleaner, more durable, and more removable installation.
How often should I replace the window seal?
Inspect it at the start of every cooling season. Replace the seal when it has flattened, cracked, detached, absorbed moisture, or no longer closes the gap continuously.
Conclusion
The best way to seal a window air conditioner is to measure carefully, clean the frame, use the least bulky material that closes the gap, and inspect the installation after the unit runs. Foam tape handles small irregular spaces, side panels cover wider openings, and portable AC window kits belong with hose-based systems. A neat, removable seal improves comfort, protects your cooling budget, and keeps a small room from feeling cluttered with unnecessary hardware.