Key takeaways
- Mount a television on an entertainment center only when the furniture includes a manufacturer-approved TV mounting system. Otherwise, mount the television to a suitably supported wall behind the console or use its approved tabletop feet. That distinction is the most…
Mount a television on an entertainment center only when the furniture includes a manufacturer-approved TV mounting system. Otherwise, mount the television to a suitably supported wall behind the console or use its approved tabletop feet. That distinction is the most important part of how to mount tv on entertainment center: a decorative back panel or ordinary cabinet top is not a structural TV bracket.
As an Amazon Associate we earn from qualifying purchases.
By KK Home Furnishings Editorial Team
Plan and Measure Your Entertainment Center TV Mount
First determine which structure will actually carry the display. A purpose-built console with a factory spine and swivel mount differs from a wall-mounted TV positioned above an entertainment center, even if the finished arrangement looks similar. Follow the manuals for the exact furniture, bracket, TV, and wall construction; never rely on a generic video to approve an unlisted combination.
Identify Whether the Center Has a Rated TV Mount
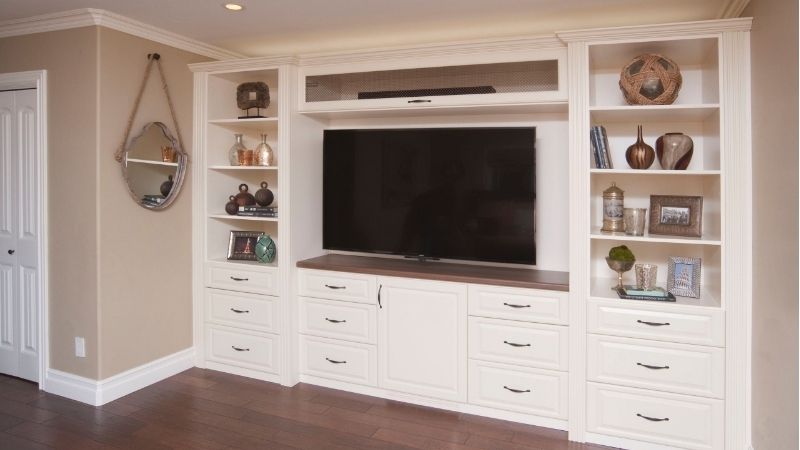
Some entertainment centers are explicitly designed for several display configurations. The Whalen XL-44 family, for example, supplies parts for a tabletop console, a floating swivel TV mount supported by its metal spine, or a separate wall-mounted frame [Whalen Furniture, XL-44 Rev. E, 2023]. Its instructions show which structural components belong to each route. Those layouts are manufacturer-specific examples, not permission to retrofit another cabinet.
If your entertainment center has no rated mounting frame, spine, dedicated bracket attachment points, and corresponding instructions, do not fasten a generic VESA plate to its thin backing or particleboard. A wall mount can still position the TV directly above the unit while keeping the furniture separate from the load path. If the wall is unsuitable or the mounting rules are unclear, use an approved tabletop setup or consult a qualified installer.
Match TV Weight, Mounting Holes, and Hardware
Read the television model label and find its weight without the tabletop stand, rear mounting-hole spacing, compatible mount type, and required screws. Then compare those specifications with the center or wall bracket ratings. The VESA hole pattern alone is not proof that the mount is safe: Sony warns that some TVs have VESA-compatible hole spacing but different hole depths or installation conditions [Sony, 2026].
Check the full TV weight rating, screen-size limits, bracket geometry, and any restrictions on pivoting or tilting. Whalen XL-44 Rev. E, for instance, publishes a 135 lb television weight ceiling for that product, alongside configuration-specific sizing information [Whalen Furniture, 2023]. Do not apply that value to another entertainment center or assume a model advertised for a certain screen diagonal fits every television of that size.
Prepare the Location, Support, and Help Needed
Position the cabinet on a level floor, inspect its frame for damage, and make room behind the unit for tools and cables. Check the furniture manual for anti-tip restraint instructions before raising a display. The CPSC recommends securing televisions and heavy furniture to help prevent tip-overs, particularly where children can climb or pull on drawers and shelves [CPSC, 2026]. A television attached to an unstable cabinet can still fall with that cabinet.
Arrange a second adult to lift the display and establish a safe holding surface according to the TV manufacturer. If the design uses a wall mount, identify suitable structural support and wall-specific hardware before drilling; drywall alone is not an assumed support. Sony advises professional installation when the wall structure or mounting requirements are uncertain [Sony, 2026]. Separate cable planning from support planning: cable covers and zip ties are not load-bearing anchors.
| Material or Tool | Size or Spec | Cost Tier | Substitute |
|---|---|---|---|
| Television and console manuals | Exact model and revision | Included or official download | Request the correct documents from each maker |
| Mounting frame and TV brackets | Approved for the display and structure | Included or model-specific purchase | Approved matching mount, never cabinet trim |
| Bolts, washers, and spacers | TV-specified type, length, and depth | Usually mounting kit hardware | Only parts verified against the TV manual |
| Level and tape measure | Check mount alignment and bracket spacing | Basic household tools | Equivalent accurate level and measure |
| Wall support tools, if required | Matched to approved wall and bracket | Basic to specialist tools | Qualified installer for uncertain wall structure |
| Furniture anti-tip restraint | Specified for the exact entertainment center | Supplied or compatible kit | Manufacturer-approved replacement restraint |
How to Mount a TV on an Entertainment Center Step by Step
The steps below describe a rated integrated mount first and identify where a wall-mounted configuration changes the job. They are a planning sequence, not replacements for the numbered fastener instructions supplied with a particular center. If a part, hole, or bracket in your room does not match the manual, pause before hanging the television.
Step 1: Verify the Exact Mounting Configuration
Locate the cabinet model and identify its approved display method in the manufacturer diagram. A three-in-one center might allow a tabletop TV, a floating swivel mount rising from its own structural spine, and a separate mount fixed to the wall. Choose one route before installing the spine or mounting frame. The Whalen XL-44 Rev. E instructions, for example, direct users to different pages for its tabletop, floating swivel, and wall configurations [Whalen Furniture, 2023].
Lay out the parts listed for that route and confirm that the weight and screen-size labels agree with your actual TV. The cabinet must be fully assembled and all structural bolts tightened before it carries a screen. Do not mix the wall-mount screws, anti-tip restraint hardware, and TV-back bolts simply because they look similar. They perform different jobs and may have different lengths or material requirements.
Step 2: Stabilize the Console and Prepare the Mount
Check the floor level and the stability of the entertainment center before adding the heavy display. For a factory floating mount, install the dedicated upper spine, swivel bracket, and mounting frame in the order and orientation printed in its booklet. The Whalen XL-44 Rev. E manual attaches its swivel bracket to the spine and then fits the mounting frame; it calls for checking that the spine is square and the frame level before the television is installed [Whalen Furniture, 2023].
Install the manufacturer-specified furniture tip-over restraint at its stated connection points, choosing appropriate attachment to the actual wall structure. An anti-tip strap is not a substitute for the steel mount itself, and attaching a TV to a cabinet does not eliminate the need to restrain the cabinet. If the unit lacks its original brackets or the spine is bent, do not improvise a timber shim or an aftermarket clamp; obtain parts and instructions for that model.
Step 3: Attach the Matching Monitor Brackets to the TV
Disconnect the TV and remove its tabletop base only as the TV manual directs. Identify the threaded mounting holes and match the vertical monitor rails to them. If the back is recessed or curved, use the spacer arrangement expressly permitted by the mount and television documents; the correct fastener must engage securely without reaching too far into the chassis. Sony cautions that improper substitute screws can damage the display or allow the set to fall [Sony, 2026].
Support the screen on the protective surface and in the orientation specified by its manufacturer. Avoid squeezing the panel or pressing against fragile glass while installing the rails. Use the specified bolt type and tighten only as directed, without stripping the threads. Verify that the two monitor brackets sit evenly and do not cover connectors or ventilation grilles. Stop if the holes do not align or a bolt resists hand-starting; forcing it is not a valid compatibility test.
Step 4: Secure the Frame to the Approved Structure
On an integrated floating mount, the frame attaches to the center’s factory support spine, not to a decorative rear board. Recheck the printed fastener locations, mounting-frame orientation, and spine position before tightening. For the Whalen XL-44 Rev. E design, the bracket and frame are distinct components joined with the supplied fasteners; copying its bolt positions onto a different console would defeat the maker’s load design [Whalen Furniture, 2023].
If you are mounting to the wall behind the entertainment center, the frame must be fixed to wall support approved by the mount and TV manuals. Wall materials and framing types need different anchors and procedures. Do not treat plasterboard anchors for a light picture as sufficient for a television, and do not drill until hidden electrical or plumbing hazards have been considered. Sony recommends a qualified professional for its TV wall installations and says required wall strength is model-dependent [Sony, 2026].
Step 5: Lift the Television onto the Frame and Engage Locks
With two adults where the manuals specify, raise the television by its permitted handling points and align the hooks on the rear monitor brackets with the frame. Lower the set gently until the brackets are seated exactly as shown. The Whalen XL-44 Rev. E floating-mount instructions call for the monitor-bracket hooks to rest on the mounting frame before both lower lock bolts are tightened against the underside of that frame [Whalen Furniture, 2023]. Not every mount uses this same locking mechanism.
Keep supporting the TV until the manufacturer’s locking tabs, safety screws, or bolts have been fully engaged and checked. Center the screen only within the allowed adjustment range, then verify level and fastener security using the documented method. Never leave a heavy display hanging on partially engaged upper hooks while searching for missing locking parts. If the television shifts unexpectedly or the frame flexes, lower it safely and have the setup reviewed before use.
Step 6: Check Clearance, Cables, and Final Stability
Inspect the finished setup for the TV maker’s required airflow clearance, accessible connections, and adequate room for any approved tilt or swivel motion. Route cables along the center’s built-in channels or separate clips, away from pinch points and hinges. The Whalen XL-44 instructions include rear cable wheels for its supported configurations, but those are organizers rather than TV restraints [Whalen Furniture, 2023]. Confirm that the power cord does not pull taut when the mount moves.
Recheck that the stand is level, the wall restraint is installed as required, no fasteners are left loose, and the TV cannot be lifted off its mounting frame without deliberately releasing its locks. Keep toys, remotes, and tempting objects away from upper shelves in homes with children. The US Consumer Product Safety Commission advises anchoring televisions and heavy furniture to reduce tip-over hazards [CPSC, 2026]. Revisit the safety checks after relocating the center or changing to a heavier TV.
Frequently Asked Questions
Once the TV is securely mounted, questions usually shift from hanging the screen to fitting the equipment and living with the setup. These answers cover hardware reuse, sightlines, cabinet modifications, and extra accessories without replacing the specific support instructions for the chosen mounting system.
Can I reuse an older TV mount with a new television?
Only if the older bracket manufacturer explicitly approves the new TV’s weight, hole pattern, mounting requirements, and installation environment. A matching VESA pattern is one compatibility test, not the entire decision. If the bracket has missing pieces, unknown ratings, corrosion, or no readable product identification, replacing it with an approved mount is preferable to guessing at its capabilities.
New television models can differ in screw-hole depth and required spacers even when screen sizes look similar. Retrieve the manuals for both products and confirm the exact parts before reusing any bolt. If you are transferring to a different wall, the old fasteners may not be suitable for the new wall material or structure, so the wall-installation instructions must be reviewed independently.
How high should a TV sit above an entertainment center?
Choose a position that permits comfortable viewing from the actual seating locations while meeting the bracket’s adjustment and clearance rules. There is no single mounting height that suits every screen, sofa, room, or viewer. Mark the intended screen outline with removable tape, sit in your normal viewing position, and check sightlines before committing to the bracket location.
Also consider whether a soundbar, center-channel speaker, or cabinet door will obstruct the screen or its connectors. Leave the ventilation clearances required by the TV maker and allow enough access to remove the television safely in the future. A very high placement above a tall unit can feel uncomfortable even when it is mechanically secure.
Can I remove shelves or drill a cabinet to make the TV fit?
Do not alter structural shelves, vertical dividers, rear supports, or the metal mounting spine unless the entertainment center manufacturer specifically approves the modification. Some shelves are decorative, while others brace the cabinet against twisting or support its listed weight rating. Drilling new bracket holes without a verified load path does not make an ordinary cabinet a rated television mount.
If an obstruction prevents a compatible TV from fitting, check whether the model has a factory-approved alternate configuration. Otherwise, choose a suitable wall mount or replace the unit with furniture designed for the desired arrangement. Keep any removed factory parts and instructions if the manufacturer permits a reversible conversion, rather than discarding the original hardware.
Can a soundbar hang from the same TV mounting system?
Sometimes, but only when the bracket and television makers approve that accessory and the combined arrangement. A soundbar can add weight and change how force acts on a swiveling or tilting mount. Some systems use a separate soundbar attachment kit with its own limits, while others require the speaker to rest on the furniture instead.
Check the accessory compatibility list, the mount’s remaining capacity, and the screen’s permitted movement before installing. Avoid fastening a soundbar bracket through convenient but unspecified TV screws. If soundbar or speaker cables might catch when the display swivels, provide the slack and routing required by the relevant manuals or use a fixed speaker position.
Final Thoughts
The reliable approach to how to mount tv on entertainment center is to confirm the support structure first, then match the TV, mounting frame, bolts, and restraint instructions to that exact setup. Use only a rated integrated mount or a properly installed independent wall bracket. Secure the furniture, engage every TV lock, and stop if compatibility or wall strength is uncertain.