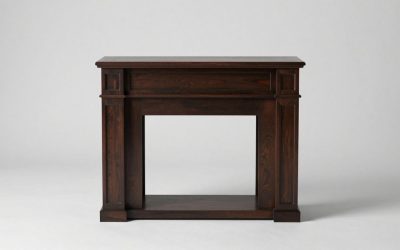
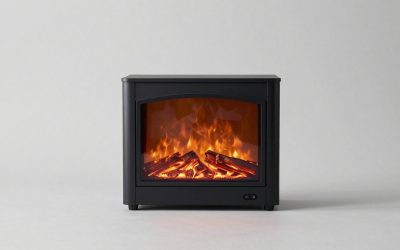
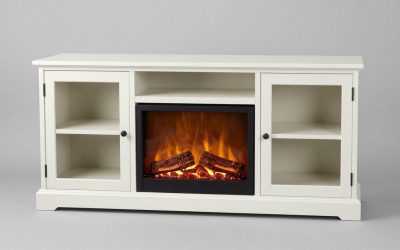
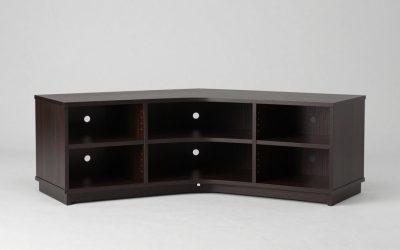
A fireplace TV stand can look rustic without being rebuilt. Soft, weathered color, a low-sheen furniture finish, and carefully chosen hardware can change the cabinet’s appearance while preserving the electric heater. If you are researching how to update fireplace tv stand to look rustic, start with the cabinet surface and the firebox manual, not a distressed-paint technique.
As an Amazon Associate we earn from qualifying purchases.
By KK Home Furnishings Editorial Team
Plan a Rustic Makeover Without Altering the Heater
The strongest makeover respects a simple boundary: the furniture may be refinished if its materials and manufacturer permit it, but the electric firebox is an appliance. Keep the heater’s original face, vents, cord path, enclosure, and service access intact. Choose your finish after you know what the removable cabinet components are made from.
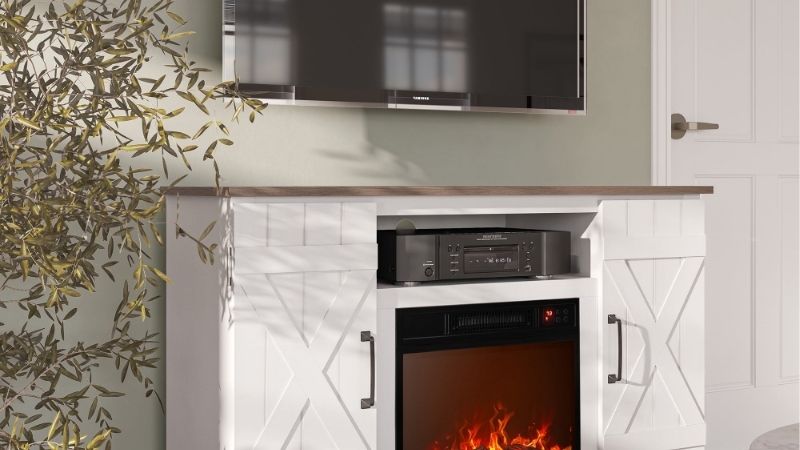
Find the Firebox Model and Mark Areas You Cannot Change
Photograph the assembled unit, find the heater’s identification plate, and locate its exact owner and cabinet-assembly manuals. Look for intake and exhaust openings, front trim, control access, and any instructions for removing or servicing a fireplace insert. A cabinet sold with one firebox does not establish clearances for a different insert or a custom enclosure.
Dimplex’s U.S. XHD owner manual, 7216430100R02, prohibits blocking the firebox’s ventilation or exhaust openings and tells owners to disconnect power before servicing [Dimplex, XHD owner manual]. Those instructions apply to the identified XHD models, not every fireplace TV stand. If your model information is missing, limit the project to reversible decoration away from the appliance until you obtain the correct guidance.
Identify the Cabinet Material Before Choosing a Finish
Inspect the rear of a removable door, the underside of a shelf, and an exposed edge. Solid wood may reveal continuous grain, while veneer shows a thin real-wood layer over another substrate. Printed woodgrain laminate, wrapped foil, and painted MDF call for different prep and may not tolerate aggressive sanding. A rustic-looking color cannot fix a swelling panel or separating joints.
General Finishes recommends cleaning, abrasion appropriate to the surface, and an adhesion test before refinishing existing finishes. Its guidance warns that laminate is especially challenging and may need a suitable bonding primer [General Finishes, Milk Paint instructions, accessed October 2026]. Do not assume raw-wood stain will penetrate a factory-sealed or printed surface. Test your complete finish system on a concealed furniture area.
Choose One Rustic Direction and Assemble the Right Supplies
For a lighter farmhouse feel, choose warm off-white or mushroom-colored cabinetry with understated dark pulls. For a lodge-inspired look, try smoked-brown accents on existing real-wood areas and charcoal-toned knobs. For a contemporary rustic room, a muted greige case with simple iron-look hardware can work without faux distressing. Commit to one direction rather than combining every rustic effect.
Gather a gentle cabinet cleaner, protective coverings, painter’s tape, a compatible sanding pad, a manufacturer-recommended bonding primer if needed, furniture paint, and replacement hardware sized to the existing holes. Choose a soft cloth and a small brush for detailing, plus ventilation and personal protection specified on coating labels. Keep all coating materials and flammable supplies away from an operating heater.
| Material or Tool | Size or Spec | Cost Tier | Substitute |
|---|---|---|---|
| Surface cleaner | Compatible with the cabinet finish; residue removed before coating | Low | Maker-approved mild detergent |
| Scuffing pad | Grit appropriate to the existing coating, not an automatic stripping step | Low | Fine sanding sponge after a hidden test |
| Bonding primer | Rated for identified laminate or painted substrate where required | Medium | Use no primer only if paint maker approves and adhesion tests pass |
| Furniture paint | Compatible low-sheen product for the actual cabinet material | Medium | Compatible clear or tinted finish on real wood |
| Replacement hardware | Matches existing hole spacing and door thickness | Low to Medium | Clean and reuse sound original pulls |
| Protective topcoat | Only if the selected paint system recommends or permits it | Medium | Use the paint system’s self-sealing finish where specified |
How to Update a Fireplace TV Stand Step by Step
This sequence covers cosmetic work on the cabinet only. It does not authorize removing an electric insert, changing a factory enclosure, or covering a heat outlet. If access to a surface requires disturbing the appliance’s mounting, obtain the manufacturer’s service instructions or use a qualified technician instead of improvising.
Step 1: Power Down, Cool the Insert, and Record the Original Setup
Turn the fireplace off, let it cool as directed by its manual, and disconnect it from power before working around the cabinet. Remove the television and other electronics safely, disconnecting and labeling cables first. Take photographs of the original arrangement, including the heater opening, control positions, cabinet backs, shelves, and any retaining hardware you can see.
Remove ordinary cabinet handles and removable storage doors when the furniture maker permits it. Do not loosen screws that secure the heater or the enclosure just to make painting easier. Cover the firebox face and openings against stray paint or dust while work is under way, then remove every temporary covering before reconnecting power. Never perform coating work while the heater operates.
Step 2: Clean Furniture Panels and Test the Existing Coating
Clean grease, dust, polish residue, and grime from the furniture surfaces according to the selected finish maker’s instructions. Pay particular attention to corners and the top where hands, media devices, and cleaning sprays may have left contamination. Wipe off cleaning residue and allow the cabinet material to dry fully; don’t soak edges of particleboard or moisture-sensitive MDF.
On a hidden furniture panel, test whether the proposed paint adheres after the recommended preparation. General Finishes specifically advises such testing for previously finished surfaces, particularly glossy or laminate furniture [General Finishes, Milk Paint instructions, accessed October 2026]. If the test peels or stays tacky, change the primer or coating plan rather than covering the entire console and hoping it cures.
Step 3: Repair Visible Furniture Defects and Scuff Only Where Appropriate
Tighten ordinary loose cabinet hardware without disturbing the firebox, and repair small cosmetic holes with a filler approved for the substrate and finish. Replace severely swollen shelving or split door components only with properly compatible furniture parts; structural damage calls for a repair assessment. Don’t disguise cracked load-bearing joints with filler or paint while continuing to support a television above them.
Scuff-sand the furniture finish only to the extent its material and coating instructions permit. Thick sanding can cut through wood veneer or damage a decorative laminate film. Vacuum dust and clean the prepared furniture surfaces. If the piece has an old or unknown painted coating, evaluate possible lead hazards before disturbing it; the EPA’s lead-safe guidance is relevant to potentially lead-containing older coatings [EPA, 2026].
Step 4: Prime the Cabinet and Establish a Restrained Base Color
Protect original labels, ventilation slots, glass, electronics, and heater controls from primer and paint. Apply any approved primer in the sequence and drying conditions specified for your coating system. A glossy laminate cabinet may require a different bonding approach than a sanded painted-wood cabinet. No primer should be used on the heater itself without explicit manufacturer authorization.
Apply your chosen low-sheen furniture color in controlled, even coats. Warm gray, faded mushroom, deep olive, and soft cream can all read as rustic when paired with appropriate hardware. Watch edges and door corners for heavy paint buildup that could make moving parts bind. Follow the product’s recoat instructions instead of treating a touch-dry film as fully cured.
Step 5: Add Weathered Character Without Faux Damage
A subtle rustic surface often needs only a softer color and mild visual variation. If the coating system supports decorative glazing or dry-brush layering, first practice on a test board with the same base color. Work sparingly on furniture corners or recessed trim. Excessive dark streaking can look like surface damage and make an electric fireplace console feel untidy instead of aged.
Distress only areas that can withstand it and only when the product maker’s finish instructions allow it. Avoid sanding through thin veneer, wrapped laminate, or an unknown old paint film. If the piece has a genuine stained-wood portion, an approved overcoat system may alter its tone without stripping it; Minwax’s PolyShades guidance, for example, describes preparation for certain previously clear-coated wood surfaces, not painted metal or laminate [Minwax, PolyShades guide].
Step 6: Refresh Handles and Add Rustic Details to Safe Cabinet Areas
Replace glossy pulls with simple aged-bronze, iron-look, or understated wood hardware that fits the existing holes. Fit knobs to the actual door or drawer thickness, and verify that fasteners cannot puncture a hidden power cord or the firebox enclosure. The visual change can be substantial without adding structural trim, blocking a vent, or building new doors around the heating appliance.
Use restraint with decorative additions. A narrow frame around a separate storage door might be an option if the furniture maker permits the added weight, but reclaimed boards and adhesive shiplap should never creep over the firebox opening or required access zones. Styling the wall and surrounding room with natural textiles or wood accents is a lower-intervention alternative to altering the console’s heated section.
Step 7: Let the Finish Cure, Reassemble, and Check Normal Operation
Allow the finish to reach the manufacturer’s stated handling and cure condition before installing hardware or replacing equipment. General Finishes notes that its water-based Milk Paint can require a much longer full cure than a simple touch-dry period [General Finishes, Milk Paint instructions, accessed October 2026]. The actual timing depends on the coating and conditions, so consult your product’s label rather than using one universal waiting period.
Remove all masking, cloths, tools, and coating containers, then confirm every intake, outlet, control, and cable route remains as originally required. Restore the TV only if the cabinet is still rated to support its base and weight, and secure televisions and furniture against tip-over where appropriate [CPSC, 2026]. Reconnect and test the fireplace according to its manual; stop if you notice an unusual smell, restricted airflow, unexpected heat, or a new operating problem.
Frequently Asked Questions
These questions address the choices that most often tempt homeowners to cross the boundary between a furniture makeover and an appliance modification. A rustic look is a decorative goal, not a reason to change a listed heater installation. Keep every adjustment reversible when possible and verify unfamiliar surfaces before refinishing.
Can I Paint the Metal Fireplace Insert to Match the Rustic Cabinet?
Do not assume ordinary furniture paint is suitable for the metal face or heater components. Paint can affect labels, service access, heat-exposed surfaces, and openings even when it appears to adhere. A product marketed as high-temperature paint does not automatically make changing an electrical appliance’s original finish an approved modification. The applicable insert manufacturer’s instructions come first.
If you dislike the heater’s modern appearance, change the surrounding approved furniture color, select more understated cabinet hardware, or adjust nearby decor instead. Ask the heater manufacturer about any officially compatible trim option for the exact model. Never paint heater grilles, glass, control buttons, warning labels, or electrical parts as part of a cabinet refinishing project.
Can I Install Reclaimed Wood or Shiplap Around the Firebox?
Only if the exact fireplace and furniture manufacturers allow that material and construction arrangement, with their specified dimensions and clearances maintained. Reclaimed boards are not inherently appropriate near a heater because they look rustic. Adding a face frame or decorative surround may block airflow, restrict access, or create a different enclosure from the one intended by the manufacturer.
When the manuals do not approve a proposed change, treat it as unresolved rather than assuming a gap that looks generous is sufficient. A technician or the manufacturer’s support team can advise on the actual product. The safer decorative choice is often to leave the fireplace opening entirely untouched and bring the reclaimed-wood texture to other furniture or wall decor.
Will Chalk-Style Paint Stick to a Laminate Fireplace TV Stand?
It depends on the laminate, its condition, the primer, and the actual paint system. Laminate is designed to resist damage and therefore can also resist coating adhesion. General Finishes notes that even its furniture paint on laminate needs careful preparation and may require a bonding primer [General Finishes, Milk Paint instructions, accessed October 2026]. A rustic chalky appearance alone does not establish durability.
Identify the substrate, follow the brand’s laminate-specific instructions, and make a discreet adhesion test before coating visible panels. Avoid stripping or deeply distressing a thin decorative film. If the cabinet covering is lifting, bubbling, or warped, a new paint color may accentuate the damage instead of delivering a clean-looking rustic renovation.
How Can I Make the Console Rustic Without Making It Too Dark?
Keep large cabinet faces in a soft neutral and reserve dark tones for small details such as pulls, shelf edges, or separate decor. A warm gray or pale taupe can read rustic beside a stone-textured wall, woven basket, and natural wood accents. Use a sample board next to the room’s flooring and wall color, then inspect it in daylight and at night.
Consider how the dark fireplace window already anchors the center of the stand. Repeating black across every door can make that area visually heavy. A lighter case finish gives the insert breathing room while still delivering the relaxed, weathered mood that motivates a rustic makeover. Decorative decisions remain flexible as long as the heater’s original safety requirements are preserved.
Final Thoughts
To give a fireplace TV stand a rustic update, treat the job as a cabinet-surface refresh: identify its material, test a compatible finish, choose one subdued color scheme, and replace small decorative hardware. Leave the electric firebox, vents, electrical route, and approved enclosure unchanged. The most convincing result is a furniture makeover that looks intentional and still operates as safely as the original installation permits.