Key takeaways
- Building a fireplace TV stand means planning for both television loads and an electric heater. To understand how to build fireplace tv stand cabinetry safely, choose a firebox approved for a custom enclosure and design a supported, freestanding cabinet around…
Building a fireplace TV stand means planning for both television loads and an electric heater. To understand how to build fireplace tv stand cabinetry safely, choose a firebox approved for a custom enclosure and design a supported, freestanding cabinet around its installation manual. Do not cut a heater-sized hole into an ordinary TV stand and assume it will be safe. The television needs its own dependable load path, while the firebox needs the space, ventilation, access, and power connection its manufacturer specifies.
As an Amazon Associate we earn from qualifying purchases.
By KK Home Furnishings Editorial Team
Plan and Measure Your Fireplace TV Stand
This guide covers a rectangular console positioned along a straight wall, not the angled cabinet geometry of a corner fireplace TV stand. Start with a model-specific insert and a proven cabinet construction approach. If your selected appliance is intended only for a different installation type, buy a compatible unit or a complete manufactured fireplace console rather than redesigning its safety clearances yourself.
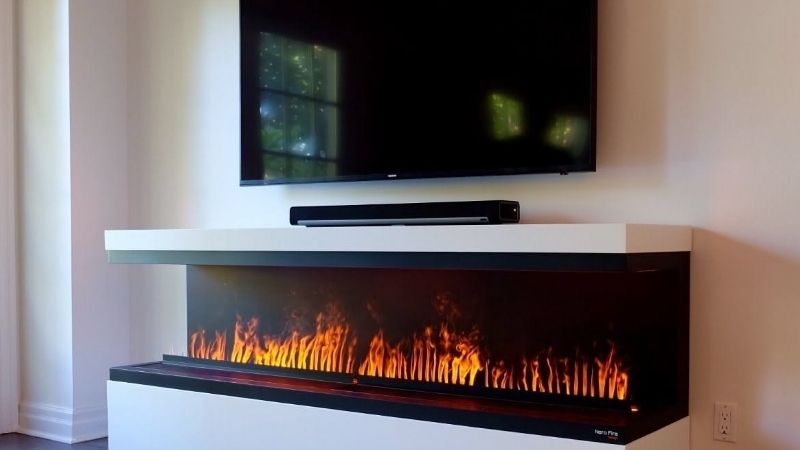
Choose an Insert That Permits a Custom Cabinet Opening
A purpose-built electric firebox is different from a freestanding electric stove or a finished heater that is not designed to be enclosed. Check the exact model number, installation method, manufacturer-approved opening, fastener locations, air-intake requirements, and power supply before buying wood. A decorative flame display is still an electrical appliance with wiring and heat-management requirements, even if you expect to use the heater only occasionally.
As a documented example, the Dimplex DF26L-PRO and DF26DWC-PRO owner’s manual lists an opening of 24-3/8 inches wide, 18-1/2 inches high, and 8 inches deep for its DF26 firebox. The manual also identifies clearance for air circulation beneath the appliance and at least 1/2 inch behind it [Dimplex, DF26/DF28 PRO Owner’s Manual, publication 7215830100R00, pp. 6-7]. These are instructions for that model family, not standard cutout dimensions for a generic fireplace TV stand.
Those opening measurements are especially useful because the same manual lists the DF26 appliance body as 26 inches wide, 18-7/8 inches high, and 7-1/2 inches deep. The visible front and the mounting opening are not interchangeable dimensions. Keep the manufacturer’s mounting drawing beside the cabinet plan, and confirm whether decorative trim is supposed to cover a flange or remain away from the heater outlet.
Measure the TV, Cabinet Footprint, and Electrical Access
Record the television’s weight, the full width of its feet or pedestal, and the room available on a level, low console. The diagonal screen measurement does not reveal how far apart the supporting feet sit. Check the cabinet top against the actual base, then allow space for a soundbar, remote-control access, and a reasonable line of sight from the seating area. A flat-screen TV should never perch over the unsupported edge of a homemade top.
Choose the cabinet width and depth from those practical requirements, not from the firebox face alone. Measure the wall, floor trim, walkways, outlet location, and the clearance needed to move the finished cabinet for servicing. Place any open equipment bay away from blocked firebox openings and use the receiver or game console manufacturer’s ventilation instructions when selecting shelf height and depth.
For the DF26-PRO example, the manufacturer specifies 120 V and a 15-amp circuit, with a dedicated circuit preferred and potentially required if repeated breaker trips occur [Dimplex, 7215830100R00, p. 6]. This appliance has a published 1,500 W maximum input under a stated test condition. Discuss a poorly located outlet or uncertain circuit with a qualified electrician before building a cabinet that could trap an inaccessible receptacle.
Plan a Separate TV Support Path and Firebox Service Path
Draw the cabinet as a structural media stand with a front-facing appliance opening, rather than as a thin decorative frame around a heater. The top should pass TV loads into sound side panels, rails, dividers, or other supports specified by the cabinet design, then into a stable base. A large central opening removes material from the exact area where a conventional TV console might otherwise rely on a middle divider. Do not claim a rated TV capacity simply because plywood and screws look substantial.
The safest starting point is a complete fireplace-console design with engineered cabinet supports and a specifically compatible firebox. If you are modifying a general TV-stand woodworking plan, ask a competent cabinet builder to evaluate the new span, joinery, anti-tip approach, and load before placing a television on it. Never assume the firebox shell can act as a structural post or carry the TV top unless the maker expressly designs it to do so.
Plan an accessible service route as carefully as the visible front. You should be able to remove the firebox using its approved fasteners without destroying the cabinet, reach the disconnect as allowed by the electrical installation, and vacuum or inspect permitted access points when the device is off and cool. Avoid sealing the entire rear cavity with decorative paneling merely to hide cables.
| Material or Tool | Size or Spec | Cost Tier | Substitute |
|---|---|---|---|
| Approved electric firebox | Exact model and installation manual; DF26-PRO is one example | Major appliance | Factory-made complete fireplace console |
| Cabinet case and support material | Specified panels, rails, dividers and fasteners from reviewed cabinet design | Core build | Professional cabinet fabrication |
| Measuring and squaring tools | Tape, straightedge, square and level | Basic tools | Precise shop-cut components |
| Panel cutting and drilling tools | Blades, clamps and screws matched to board type | Workshop dependent | Cabinet shop cutting and assembly |
| Airflow and access details | Clearances and openings from the chosen firebox manual | Design critical | Choose a different approved firebox |
| Anchoring and finish supplies | Wall-suitable restraints and compatible cured surface coating | Safety and finish | Qualified installer and factory finish |
How to Build a Fireplace TV Stand Step by Step
These steps describe the correct planning and assembly sequence for a rectangular media cabinet. They do not replace a certified appliance manual, a complete structural cut list, or electrical work by a qualified professional. Check the firebox instructions again before every permanent fastening operation. If the appliance manufacturer does not allow your proposed enclosure, stop and change the design.
Step 1: Draw the Cabinet Around the Actual Firebox
Lay out the front elevation, top view, side view, and service access before cutting material. Start with the specified fireplace mounting opening, its front flange position, and the required space around the unit. Mark the zones that cannot be covered, including the manufacturer’s intake and exhaust paths. Then add the left and right storage compartments, independent load-bearing supports, top overhang, and an unobstructed installation route.
The Dimplex DF26-PRO example gives a useful reason to start from the appliance drawing: its opening width differs from its overall body width. For that documented unit, the manual identifies a minimum 1/2-inch rear clearance and circulation beneath the firebox [Dimplex, 7215830100R00, p. 7]. Do not copy those numbers to a different insert, and do not use them as a reason to reduce a different manufacturer’s stated clearance.
Make a paper or cardboard full-size outline of the selected firebox front if it helps you visualize the finished proportions. Include where the controls, glass panel, cord, and mounting screws will be located. Check whether the planned cabinet can enter the room once assembled. The goal of this step is an unambiguous drawing and access plan, not a universal measurement that happens to fit a product photograph.
Step 2: Cut Panels and Build a Square, Stable Base
Use the dimensions and joinery from the vetted cabinet design. Cut matching side panels and base members, mark structural partitions, and identify the rails that support the TV top. Dry-fit the lower cabinet, check for square corners and a flat bearing surface, then assemble the supports according to the design. A shelf opening that looks symmetrical from the front can still be twisted and prevent an appliance from sliding in correctly.
Select plywood or lumber suitable for the published cabinet plan, rather than treating any decorative board as structural. Pre-drilling, correct screw length, edge-distance limits, and appropriate adhesive depend on the real materials and joints. A thin ornamental back panel is not automatically a replacement for specified bracing, and removing a divider to enlarge the firebox bay may substantially change the cabinet’s stiffness.
Set the finished base temporarily in its intended position and inspect for rocking on the floor. Correct the level and the support structure before continuing. Do not load the case with a TV or rely on the firebox to hold its shape during this trial assembly. If the span over the central opening has not been checked for the expected screen load, have the design reviewed now, while modifications are still possible.
Step 3: Frame the Appliance Bay Without Blocking Airflow
Build the firebox opening to the exact installation drawing, preserving any prescribed clearance, air-intake path, front heater outlet, and mounting surface. The cabinet framing must support itself while the appliance is removed. For a model approved for custom mantel installation, leave the proper opening and approved fastening points accessible instead of trapping the unit behind glued-on face trim.
In the DF26-PRO example, Dimplex explicitly says to keep airflow beneath the device and leave rear space; it also warns against installation directly on carpet or a similarly soft surface that could restrict circulation [Dimplex, 7215830100R00, p. 7]. That means a solid, correctly positioned platform can be appropriate only when it follows the selected model’s installation directions. It does not authorize blocking the bottom or improvising a close-fitting sealed wood box.
Stop if a face frame crosses the heater grille or if a cable must run through a hot-air outlet to reach a nearby opening. A fireplace console is not an ordinary cabinet compartment: the appliance should be treated as a removable, ventilated heater assembly. Decorative molding can be added afterward where the manual permits it, without touching or deforming the firebox body.
Step 4: Attach the Supported Top and Organize Media Storage
Fit the cabinet top to its designed structural supports and verify the proposed TV base will sit fully on a stable, level surface. A large central firebox opening makes this step especially important. If a published construction drawing calls for a header, rail, or protected cross member, keep it in the specified location instead of substituting thin fascia or relying on glue alone.
Use side compartments for items whose ventilation needs can be met without interfering with the fireplace. Keep removable shelves and cable openings in approved locations, and route cords so a receiver can be disconnected without pulling a cable across the heated front grille. Avoid positioning flammable fabrics or loose paper directly by the heater outlet; the chosen manual governs the permitted surroundings and clearances.
Dry-fit the TV stand feet on the bare cabinet top and check for an unobstructed walking route. A wall-mounted television may remove its weight from the furniture, but the wall bracket still needs its own compatible, correctly installed support. Do not treat a DIY furniture top as a wall-mounting structure or mount the television to decorative paneling unless an appropriate system has been specified for the loads.
Step 5: Install the Firebox Using Its Approved Mounting Method
Keep the appliance unplugged during fitting. Follow the unit’s exact installation order for positioning the firebox, fixing it in the cabinet, and attaching any glass or decorative media. Dimplex provides specific interior mounting-hole and bracket options for its DF26-PRO custom opening [Dimplex, 7215830100R00, pp. 8-9]. Those fasteners and locations apply only to the referenced product; do not drill new holes into another heater housing.
An example plug-in DF26-PRO unit has a grounded 120 V connection and must be plugged directly into a wall receptacle, not a power strip or extension cord [Dimplex, 7215830100R00, pp. 4, 9]. If the outlet is inaccessible, ungrounded, incorrectly located, or overloaded, ask an electrician to remedy it. Do not hide a power strip inside the cabinet or feed a plug through a newly cut hole in the appliance shell.
Before turning the heater on, inspect the opening, intake, exhaust, cable path, and removal clearance against the manual. The installation is incomplete if any instruction cannot be satisfied. A fireplace firebox is not a woodworking component to be trimmed, sanded, or rewired to compensate for a sizing error. Replace the incompatible design or appliance rather than modifying internal heat or electrical parts.
Step 6: Finish, Anchor, and Perform the Final Checks
Finish the cabinet surfaces according to the coating manufacturer’s preparation and cure directions, keeping all paint, stain, trim adhesive, and debris away from the appliance and its intake openings. It is easiest to complete dust-producing sanding before installing the firebox. If the unit has already been fitted for a trial, remove it as permitted by the manual while final woodworking and finishing are completed.
Once the finish has cured, complete the manufacturer-approved firebox installation and inspect the cabinet for wobble, loose hardware, and blocked vents. Secure the furniture and any TV resting on it according to the relevant anchoring instructions. The U.S. Consumer Product Safety Commission advises using furniture designed for televisions and anchoring TVs and furniture to reduce tip-over risks [CPSC, Anchor It; CPSC, release 26-259, February 2026]. This general recommendation also applies to a custom media cabinet in a home with visiting children.
Only then run the firebox through the normal controls and functions described in its manual. Check for unusual behavior, unexpected contact with surrounding wood, obstruction, or tripping of a breaker; turn it off and seek qualified help if anything is wrong. The manufacturer, not this general cabinet guide, determines the correct operational test, service access, and acceptable conditions of use. Never leave a suspected installation fault in operation.
Frequently Asked Questions
These questions address decisions that are not always obvious from a woodworking drawing, especially when the finished piece must support both household electronics and an electric heating appliance.
Can I Convert an Existing TV Stand Into a Fireplace Console?
Only if the original cabinet can be shown to remain structurally suitable and the exact firebox manufacturer approves the proposed installation. A standard console may depend on its center divider or back panel for stability, so removing material to create a heater-sized cavity is not a harmless cosmetic change.
Have a competent builder review the modified TV load path and check the appliance’s exact opening, air circulation, and access requirements. If there is no reliable structural or installation basis, replacing the furniture with a complete approved fireplace console is a better choice than an unsupported conversion.
Can I Put the TV on the Wall Above a DIY Fireplace Stand?
Yes, when the television is mounted with a proper bracket to wall construction suited to that TV and the heater maker’s requirements are met. Wall mounting changes the support arrangement: the cabinet carries the firebox and storage, while the wall mounting system must carry the television independently.
Do not guess at the permitted distance between a heater outlet and a mounted screen. Refer to the actual firebox and television instructions and confirm whether a proposed shelf or deflector is approved. Avoid relying on a decorative wood panel, face frame, or thin cabinet back to secure a television.
What If I Want Flame Effects but Rarely Need the Heater?
Choose a model whose instructions explicitly provide independent flame and heat control. Some fireboxes do, but the function is not universal. The Dimplex DF26-PRO manual, for example, documents separate heater controls and a disable-heat setting [Dimplex, 7215830100R00, pp. 10-12].
Even when heat is disabled in normal use, install the firebox to the full specification for its heating mode. Do not seal the vents or reduce the permitted gaps on the theory that you will never turn the heater on. Anyone else using the remote may eventually activate the heat function.
Is Building a Fireplace TV Stand Cheaper Than Buying One?
It can be, particularly if you already own tools and have an approved, straightforward cabinet plan. But a valid comparison includes the firebox itself, lumber and panels, specialized cutting or drilling, finish, anchoring, delivery, and the value of labor. A custom opening that requires a second revision can erase the apparent savings.
Compare the completed DIY bill of materials with a manufactured console that includes a compatible firebox, published television capacity, assembly instructions, and support. A premade unit can be the more sensible choice when you would otherwise need to pay for cabinet engineering and electrical changes. Do not assign a universal cost or load rating without a specific plan and current quotes.
Final Thoughts
When deciding how to build fireplace tv stand cabinetry, select the approved firebox and its manual before drawing the case. Build a stable TV-support structure around the required opening, preserve airflow and access, arrange proper power, and finish with furniture and TV anchoring. If the cabinet span or heater enclosure cannot be verified, choose a manufacturer-designed fireplace console instead.