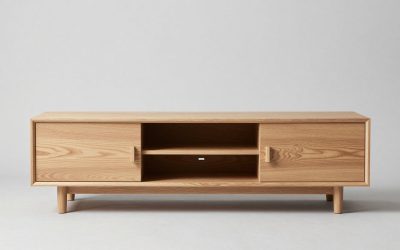
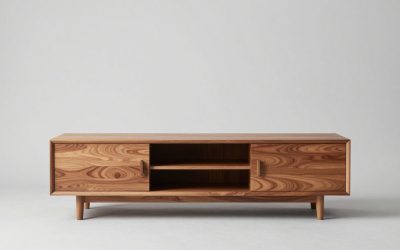
A stable TV cabinet needs a measured box, level base, and doors that swing without hitting the screen. To build a tv stand with doors, size the top for your TV and devices, cut a square plywood case, fit adjustable hinges, and anchor the finished unit. A homemade stand has no verified TV load rating without a separate assessment.
As an Amazon Associate we earn from qualifying purchases.
By KK Home Furnishings Editorial Team
Plan and Measure Your TV Stand With Doors
A door-front TV cabinet is different from a bookcase with a screen resting on it: its top, dividers, base, back, and door hardware all have distinct jobs. Kreg Tool publishes a modern four-door TV stand with a 72-inch-wide cabinet and 15.5-inch-deep panels as one documented example, not a universal size for every television [Kreg Tool, Modern TV Stand plan].
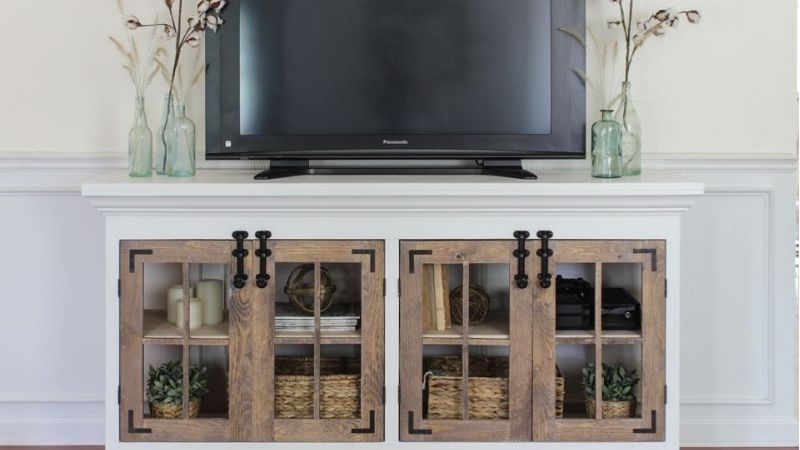
Match the Television Footprint and the Room
Start with the TV manufacturer’s exact stand-foot width, screen weight, and approved support surface. Measure the furniture location, door swing clearance, outlets, and the depth of any receiver or console. A screen diagonal does not tell you how far its feet extend, and a roomy cabinet face cannot compensate for a top that is too shallow.
Sketch the outside width, height, and depth, then map the actual equipment bays. Reserve usable cable access behind the devices instead of forcing plugs against the wall. Treat the 72-inch-wide Kreg plan as a published design example only; any resized cabinet needs a revised parts list, joint layout, support assessment, and anchoring plan.
Choose Stable Panels, Joinery, and a Proper Back
Three-quarter-inch cabinet-grade plywood makes a practical carcass material because its layers resist some of the movement seen in wide solid boards. Kreg’s published modern stand uses 3/4-inch plywood for the box, a separate hardboard back, a center support, pocket-hole joinery, and a built base [Kreg Tool, Modern TV Stand plan]. Those details work together; copying only the decorative doors is not enough.
Ask for panel goods identified as TSCA Title VI compliant when buying regulated hardwood plywood, MDF, or particleboard in the United States [EPA, composite wood standards]. Edge-band exposed plywood or cover it with a face frame. The joinery, back panel, and support layout still need to suit the specific design, especially if you add heavy components or tall legs.
Specify Door Overlay, Ventilation, and Hardware Early
A frameless cabinet with full-overlay doors needs different hinge geometry from a face-frame cabinet with inset doors. Choose the hinge type and its official drilling template before cutting final doors. The Kreg modern stand uses inset concealed hinges and plans an approximately 1/8-inch reveal around its particular doors [Kreg Tool, Modern TV Stand plan]. That reveal is a design example, not a rule for every hinge.
Plan wire entry and safe airflow while the back panel remains accessible. Doors can hide receivers and game systems, but shut faces must not block vents the device manual says to keep open. Place equipment where doors can open without striking a TV base or adjacent wall. Hardware alignment is far easier to correct on a dry-fit carcass than after paint.
| Material or Tool | Size or Spec | Cost Tier | Substitute |
|---|---|---|---|
| Cabinet-grade plywood | 3/4-inch panels in Kreg example | Moderate | Follow a verified project cut list |
| Hardboard back | 1/8-inch sheet in Kreg example | Low | Plywood back if design is revised for it |
| Door panels | 3/4-inch pine in Kreg example | Moderate | Matched panels compatible with hinges |
| Concealed hinges | Inset type in Kreg example | Moderate | Overlay hinges only after redesign |
| Wood glue and pocket screws | Screw length set for panel thickness | Low | Other joints only with a compatible plan |
| Saw guide, clamps, drill | Guarded tools and accurate measuring | Variable | Store-cut panels for large sheet breakdown |
How to Build a TV Stand With Doors Step by Step
The safest way to avoid mismatched parts is to choose a complete, published cabinet plan and keep its cut diagram and hinge schedule together. Kreg’s modern stand shows the basic workflow: cut the plywood, join a square case, add a base and doors, then finish and install the back [Kreg Tool, Modern TV Stand plan]. The steps below explain decisions that still need checking on your actual materials.
Step 1: Draw the Cabinet and Prepare a Complete Cut List
Record the cabinet’s finished width, depth, and height along with the TV’s foot spacing and weight. Then identify the separate top, bottom, sides, interior divider, back, base members, and doors. Keep a small sketch of every opening. A center divider should line up with the planned joinery rather than being dropped into an arbitrary location after the box is assembled.
Use a complete published plan for exact part lengths and screw placement, rather than mixing dimensions from different furniture builds. The Kreg modern stand lists a 72-inch top and bottom, 15.5 inches deep, plus four doors and a dedicated base [Kreg Tool, Modern TV Stand plan]. These are example dimensions from that plan, not a verified cut list for a custom-width cabinet.
Choose door type before ordering material. If you want an inset look, measure the opening after the case is square and follow the hinge manufacturer’s clearance instructions. For a painted finish, consider which exposed plywood edges need banding. For a stained top, plan how its movement and fasteners will be handled by the chosen construction method.
Step 2: Break Down the Plywood and Dry-Fit the Parts
Have a lumberyard make rough transport cuts if large sheets are difficult to handle. Use a straightedge guide and a guarded circular saw, track saw, or a properly equipped table saw for the final panel cuts. Label each part at once, keep its factory faces oriented consistently, and check the edges against a square before moving on to assembly.
Keep hands out of the cutting path and use the guard, push devices, support stands, hearing protection, eye protection, and dust controls required by your tool. OSHA’s woodworking guidance describes guards and push sticks as protections against blade contact and kickback [OSHA, woodworking machine hazards]. Stop and learn the tool setup if any operation is unfamiliar.
Lay the side panels and horizontal panels together without glue. Look for opposite edges that are parallel, joints that close without forcing, and enough room for the back panel or its recess. Dry-fitting catches a wrong panel depth before a fastener locks it into the finished cabinet. Sand inside faces while access is easy, but do not round surfaces that must meet squarely.
Step 3: Assemble a Square, Braced Cabinet Box
Mark fastening locations from the selected plan. Drill pocket holes or pilot holes for the specified joint, then clamp the sides and bottom on a flat surface. Apply wood glue where the design calls for it and drive the matching screws without stripping plywood edges. Recheck for square before each additional panel fixes the position permanently.
Fit the middle divider and top in the sequence shown in your cabinet plan. Kreg uses a center support and pocket-hole screws in its modern build, along with a back that helps complete the assembly [Kreg Tool, Modern TV Stand plan]. Do not relocate supports just to create a wider bay unless the whole design has been reconsidered for the intended load.
A cabinet can feel firm while standing empty yet distort when doors pull on the sides. Compare the two visible front openings and make sure the top sits flat without rocking. Install a compatible back or back-bracing arrangement that leaves required cable access, while retaining enough structure to resist racking. Never treat decorative trim as the sole load-bearing connection.
Step 4: Build the Base and Secure the Top
Set the assembled case on the base described in your plans. A plinth needs firm contact beneath the cabinet; a legged version requires joints suited to the forces created when the stand is moved or its doors are opened. Clamp the base in place and verify the cabinet stands level before fastening. Adjustable feet may help on uneven floors when the design supports them.
Attach a plywood top with the fastener layout specified for that build. If substituting a solid-wood top, follow a design that permits normal wood movement; fastening a wide board rigidly across its grain can lead to trouble as indoor humidity changes. Kreg’s plan uses a separate top and base system; copying its appearance does not establish the strength of an improvised substitute.
Position the piece in the intended room and verify that doors will clear rugs, baseboards, and nearby furniture. The side and back of the console should not be squeezed so tightly against the wall that power cords bend sharply. Keep the top free of equipment until the support path and anti-tip hardware are installed and checked.
Step 5: Cut, Hang, and Adjust the Cabinet Doors
Re-measure each completed opening before cutting door panels. Choose inset or overlay hinges that match the case construction, confirm the panel thickness, and mark hinge cup locations using the hardware maker’s drilling guide. A concealed-hinge jig can help maintain consistency, but its settings depend on the actual hinge and door design, not on the phrase TV stand.
Install hinge cups and mounting plates using the supplied hardware. Hang one door at a time, then adjust the hinge screws until the gaps look even and the door closes without rubbing. Kreg’s modern cabinet plan illustrates this process with inset hinges and a roughly 1/8-inch reveal for its own door layout [Kreg Tool, Modern TV Stand plan].
Check the full swing with the cabinet against the real wall, not merely in the workshop. Fit catches, pulls, or magnetic push latches according to their instructions. If a door sags, correct hinge adjustment and alignment before trimming its edge. Heavy custom doors may require a different hinge count than the example plan, so consult the hinge load guidance.
Step 6: Finish, Route Cables, and Anchor Before Use
Remove doors or hinge hardware if the finish maker recommends it, then sand and apply paint, stain, or a protective topcoat with appropriate ventilation and curing time. Do not seal over equipment vents or fill cable openings with flammable clutter. Restore shelves and doors only after the surface can safely accept contact from hardware and stored devices.
Set the console on the floor in its final position and secure the furniture and television using compatible restraints and suitable wall anchorage. CPSC’s Anchor It! campaign advises anchoring both furniture and TVs to reduce tip-over risks [CPSC, Anchor It!]. Do not claim the homemade cabinet meets a particular load rating without a qualified assessment of its actual construction.
Place the television so all feet sit fully on its approved support surface. Route power and signal cords away from hinges and sharp cut edges, confirm device ventilation with doors shut, and open each door several times while watching for contact. Finish with an unloaded wobble check, then add gear only within verified support limits; keep heavier stored items low.
Frequently Asked Questions
Door-front media storage creates small practical problems that do not appear in a plain open shelf. Before settling on pulls, finishes, or a tight-fitting back, think about how the cabinet will behave after six months of opening doors, changing devices, and dusting. These answers cover use and maintenance questions beyond the building sequence.
Will a TV remote work through closed wooden cabinet doors?
Not reliably when the remote uses infrared. A solid door blocks the line of sight to the receiver, although some equipment uses radio-frequency or Bluetooth control. Check how your exact streaming box, receiver, or game console communicates before deciding to hide it behind wood.
An approved infrared repeater, open shelf, mesh panel, or door with a compatible window may solve the access problem. Avoid drilling through electrical equipment or covering its sensors with adhesive accessories that the maker prohibits. The correct solution depends on the devices you actually own.
Can a soundbar sit behind closed cabinet doors?
It may fit physically, but closed solid doors can muffle dialogue, change the sound, and interfere with remote control. A soundbar designed to play openly should not be treated as a hidden component just because there is enough shelf depth.
Consider an open soundbar niche or placement above the cabinet in accordance with the soundbar and television instructions. Keep speakers from vibrating against loose panels. If the bar has upward-firing drivers or other placement requirements, follow the exact model guidance rather than a generic furniture diagram.
Why do cabinet doors start rubbing after the TV stand is moved?
The cabinet may be sitting unevenly, its frame may have shifted, or the adjustable hinge may have changed position. Start by checking level and confirming that the cabinet is square and properly secured. A rubbing edge does not necessarily mean the door needs to be cut down.
Use the hinge’s permitted adjustment range and inspect loose screws before touching the panel with a saw or sander. If the entire box racks or a joint opens, stop loading the stand until the underlying structure is repaired. Re-trimming a door cannot correct a failing base.
Can I reuse old cabinet doors on a new media stand?
Yes, provided the reclaimed doors are sound and their thickness, dimensions, weight, and hinge geometry suit the new cabinet. Measure them before designing the face openings; retrofit projects are usually easier when the case is sized around the doors, not the other way around.
Check for swelling, cracked joints, damaged hinge holes, peeling coatings, and old hardware that is no longer supported. Solid wood can respond to indoor moisture differently from plywood. Salvaged doors are a design choice, not evidence that the finished stand can support a television.
Final Thoughts
When you build a tv stand with doors, the decisive detail is the completed cabinet opening: it determines whether the hinges, equipment access, and door clearances actually work. For a first project, use one complete, proven cut plan without mixing parts from other builds. Record the hardware model and your final measurements so future door adjustments and equipment changes remain straightforward.