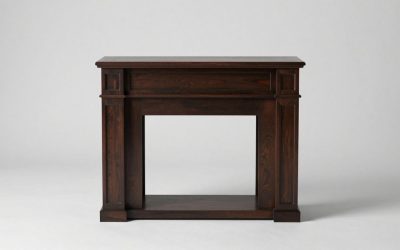
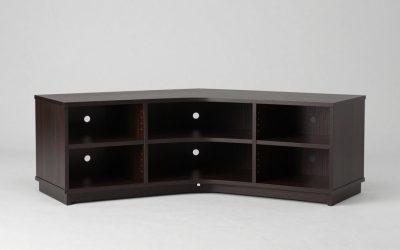
A convincing diy rustic oak finish on tv stand starts with identifying the surface underneath the old coating. Solid oak and oak veneer can show authentic grain through a compatible stain; laminate and printed wood-look panels cannot absorb ordinary penetrating stain. Choose the finishing method before sanding, then build color in controlled layers rather than trying to create age with random scratches.
As an Amazon Associate we earn from qualifying purchases.
By KK Home Furnishings Editorial Team
Plan the Rustic Oak Finish Before You Sand
The goal is a furniture finish that emphasizes oak’s natural texture with warm, muted color and a durable, low-sheen topcoat. This guide treats refinishing as a surface project, not a structural rebuild. If the TV stand is unstable or damaged, repair that separately before placing a television on it again. First inspect the cabinet and decide which route the existing material actually permits.
| Existing TV Stand Surface | Appropriate Finish Route | Surface Preparation | Watch Out For |
|---|---|---|---|
| Solid oak with a sound structure | Strip to clean wood, stain for natural grain, and protect | Remove incompatible old coating; sand with the grain | Over-sanding profiles and leaving stain under a thick clear coat |
| Real oak veneer on a stable substrate | Light, careful refinish or compatible toned topcoat | Test an inconspicuous edge; avoid aggressive sanding | Sanding through the thin veneer into core material |
| Existing clear-coated wood in good condition | Manufacturer-approved gel stain or glaze over a prepared surface | Clean, scuff-sand, and conduct an adhesion test | Reduced grain visibility and longer drying time |
| Laminate, foil, or printed wood-look finish | Bonding system and decorative wood-look paint technique | Check coating compatibility and primer requirements | Penetrating stain will not turn plastic print into oak |
| Unknown old painted finish | Assess coating and its safety before disturbing it | Seek appropriate evaluation if lead-containing paint is possible | Dust or fumes from unverified old coatings |
Identify Whether You Have Oak, Veneer, or a Printed Surface
Look at unfinished areas such as the underside of a removable shelf, a rear edge, or a screw hole. Solid wood may show continuous grain through an edge, while genuine veneer is a thin wood face bonded to another material. A repeating photographic pattern, exposed fiberboard, or a plastic-like edge band often points to a manufactured wood-look surface. None of these clues is conclusive alone; inspect several parts of the cabinet.
Many TV stands combine materials. The top may be veneered, doors may have solid-wood frames, and interior shelves may be laminated particleboard. Treat each surface according to its actual construction instead of using the most attractive panel as proof of the entire cabinet. A solid-wood door can tolerate refinishing methods that would ruin the edge of a thin veneered shelf.
Choose a Rustic Oak Color Without Hiding the Grain
For a relaxed rustic oak appearance, aim for the existing wood grain to remain visible beneath a subdued brown, tan, or weathered-toned finish. The right shade depends on the oak itself and the original stain. A golden brown produces a different result on red oak than it does on a pale white-oak sample; the can label alone cannot predict the finished cabinet.
Use a satin or matte protective finish where the chosen product supports that sheen. A heavy glossy coat can make the surface look newly lacquered, while excessive dark glaze can make oak’s open pores appear muddy. Test stain plus the actual topcoat on a hidden area or matching scrap. The color often deepens once a clear finish is applied, so approve the entire finish schedule rather than the stain by itself.
Match Products to the Old Finish and Your Work Area
There are two distinct approaches. A penetrating stain generally needs properly prepared bare wood. A compatible gel stain may color an existing sound coating after thorough cleaning and scuffing, but it behaves differently from stain on raw oak and may obscure some grain. Minwax describes preparation, stain, and protection as separate finishing stages; General Finishes recommends extended drying when its gel stain is applied over an existing finish.
Work in a well-ventilated area with appropriate gloves and other protective equipment specified on the actual labels. Remove ignition sources from the work area and protect nearby electronics from airborne dust and finish vapors. Do not assume products from different brands can be layered safely just because they are all described as wood finishes. Compatibility, recoat interval, and curing time belong to the particular products in hand.
How to Create a Rustic Oak Finish on a TV Stand
Follow these steps in order, adjusting them for the material and finish system identified above. The project is much easier to control with doors and hardware removed, a sample approved, and the cabinet empty. The purpose of distressing is a modest change in color and texture, not structural damage. Stop if an old surface, uncertain coating, or damaged veneer does not behave as expected.
Step 1: Empty the Stand and Inspect Its Condition
Unplug the television, streaming devices, and any power strips, then move the equipment away before working on the cabinet. Photograph the stand and its hardware placement so the doors, adjustable shelves, and hinges can go back where they belong. Check for sagging, loose joints, swollen particleboard edges, and splits around the support points. A fresh rustic stain will not correct a failing cabinet frame.
Check whether the original finish is intact, peeling, or stained with wax or polish. The difference matters: a sound clear coat may accept a compatible overcoat system, while an unstable layer usually needs removal by an appropriate method. If the furniture is an older painted piece with an unknown coating, avoid casually dry-sanding or stripping until the possibility of hazardous paint has been evaluated. EPA lead-safe guidance for older painted buildings illustrates why disturbing suspect coatings deserves separate precautions; it is not proof that this cabinet contains lead.
Step 2: Remove Hardware and Protect Areas That Must Stay Clean
Take off the doors, drawer pulls, hinges, cable grommets, and removable shelves where practical. Place screws in labeled containers rather than mixing hardware from doors that may have slightly different adjustments. Mask components you cannot remove, including felt glides, ventilation openings, manufacturer labels that must remain readable, and any fixed electrical accessories. Do not finish over electrical sockets or ventilation grills.
Set removable parts flat on sturdy supports with finished faces clear of abrasive dust and spills. Plan access to inside edges before staining the outside; otherwise an open door can reveal a conspicuously different stripe. Also inspect the stand’s contact points. Finishing a rear edge against the wall is optional when invisible, but leaving a rough, tacky area where cables rub can become a maintenance problem later.
Step 3: Clean Thoroughly and Decide Whether to Strip
Remove dust and grime with a cleaner approved for the existing coating, then let the surface dry fully. Kitchen-adjacent media units may carry oily residue, silicone polish, or fingerprints that cause new finishes to separate into spots. A test patch is more informative than simply applying stronger solvents to the whole cabinet. Avoid soaking veneer edges or particleboard joints, which can swell if water enters the core.
If you want natural oak grain with a penetrating stain, follow the selected stripping product’s directions to remove incompatible old coats, then prepare clean wood. If an existing finish is stable and you prefer a darker rustic tone without stripping, a compatible gel-stain method may be less invasive. General Finishes distinguishes these approaches and notes that stain over an existing film shows less grain definition. On printed laminate, use a separately tested primer-and-paint technique rather than calling a surface glaze a wood stain.
Step 4: Sand and Repair Without Erasing the Oak Character
On genuine bare solid oak, sand with the grain until the surface is evenly prepared for the stain you chose. The exact abrasive sequence depends on whether you removed an old film, repaired gouges, or are just smoothing clean wood; follow the finishing maker’s stated grit recommendation rather than a universal rule. A light hand is especially important on profiled edges where repeated sanding quickly rounds crisp cabinet details.
On veneer, do not chase every dark spot with an aggressive sander. Its decorative face may be thin enough that sanding exposes the substrate permanently. If you are coating an existing intact finish instead, scuffing for adhesion is not the same as stripping to bare wood. Test the finish system on a hidden door edge and examine it after the recommended cure interval. Use a stainable filler only where it is compatible with your chosen coloring method; filled patches often stain differently from surrounding oak.
Step 5: Apply the Oak Tone in Small, Controlled Sections
Stir the selected stain according to its label and work along the grain on a test area first. For properly prepared bare oak, wipe or brush on the product, allow the specified contact time, and remove excess as directed. Do not leave pools around the carved corners of the doors or at shelf joints. The difference between softly weathered and dirty-looking oak often comes from how evenly you remove excess color, not how dark a stain you bought.
For an approved over-finish gel-stain system, coat one manageable panel at a time and maintain a consistent wiping technique. General Finishes cautions that over-finish coats need longer drying than the same products used on raw wood; for its oil-based Gel Stain over an existing finish, the published recoat guidance is 72 hours under suitable conditions, and longer when cold or humid. That number is product-specific, not a general timetable for every gel stain. If the sample is still tacky, wait rather than sealing over it.
Step 6: Add Subtle Wear at Plausible Contact Points
A rustic finish can look natural without gouging the TV stand. If the finish schedule supports it, use a restrained glaze or compatible accent color to emphasize corners, molding recesses, or selected grain pores. Wipe back the flat areas so the front reads as oak instead of a uniformly dark brown painted box. Work from the sample you approved; excessive distressing usually looks more artificial on large, uninterrupted panels.
Physical distressing should be minimal and limited to cosmetic surfaces. Do not carve into veneer edges, loosen doors, strike the frame with chains, or sand away material at load-bearing joints. A small variation in tone around a frequently touched pull can suggest age without making the cabinet less functional. If you prefer a pale weathered look, consider a properly tested wash or finishing system specified for oak rather than combining unknown products until the color changes.
Step 7: Seal the Finish, Reassemble, and Return the TV Safely
After the color layer has dried for the full period required by its maker, apply a compatible protective finish. Minwax recommends thin coats of clear finish, working with the grain; its Polycrylic directions specify light sanding between coats and a product-specific recoat schedule. General Finishes also advises that pigmented gel stain needs a protective topcoat. The correct sheen, number of coats, and wait before heavy use depend on the exact stain/topcoat combination.
Dry to the touch is not the same as fully cured. General Finishes says its oil-based finishes may take about 30 days to cure under suitable conditions, so treat that as a maker-specific reference, not a universal oak-furniture rule. Give the media stand adequate time before placing electronics or sliding heavy items across the surface. Oil-stain-soaked cloths can self-heat and ignite if discarded incorrectly; Minwax instructs users to place its oil-finish-contaminated rags in a water-filled metal container and dispose of them according to local requirements.
Reinstall the doors and hardware only when the coating can handle gentle contact. Check that hinges move freely and cables cannot rub against fresh finish or become trapped at the rear. Confirm the cabinet still meets the manufacturer’s television-size and weight limits; refinishing never increases those limits. The U.S. Consumer Product Safety Commission advises using furniture designed for TVs and securing televisions and susceptible furniture against tip-over hazards. Restore the appropriate restraints before the room returns to normal use.
Frequently Asked Questions
After a trial panel looks right, a few small decisions can still affect the appearance of the completed TV stand. These questions cover details that may not be obvious from the main finishing sequence.
Does oak always need pre-stain wood conditioner?
No. A wood conditioner is not a universal requirement for oak. Minwax says its conditioners are particularly helpful on soft or porous woods such as pine, aspen, and maple, but the right treatment depends on your wood, stain type, and the result from a test board. Oak grain is distinctive, yet its end grain and repairs can absorb color differently from broad flat faces.
Conditioner can change the resulting shade, so test the complete process before applying it to every panel. Use a water-based conditioner with a compatible water-based stain, or an oil-based version with the system it is designed to precede. If the manufacturer’s directions make no recommendation for your chosen oak stain, a successful sample may be enough reason to skip another product.
Why does the stained oak look darker at the edges?
Exposed end grain, tiny scratches, deeper pores, and previously damaged coating can collect more pigment than a smooth face. A board edge may also be a different material from the top veneer, making a uniform stain impossible with the same technique. Check the edge construction before deciding the dark band can be sanded away.
On your next sample, use lighter applications, wipe excess more consistently, and pre-treat compatible end grain if the finish maker recommends it. Do not keep sanding a dark veneer edge until it becomes pale; you may remove the actual wood layer. An opaque or toned repair on a small exposed substrate may be more realistic than forcing the whole cabinet to match one damaged edge.
Can I change cabinet handles while updating the finish?
Yes, but measure the distance between the mounting holes on existing pulls before ordering new hardware. Matching the original hole spacing avoids filling and drilling work, which can remain visible beneath a transparent oak stain. If the current pulls are loose, inspect their screws and the surrounding wood instead of assuming new handles will solve worn holes.
For a different pull size, choose a repair method compatible with the wood and finish, then try a sample because stain may highlight filled holes. Refit the hardware after the coating has developed enough resistance for normal handling. Heavy pulls can scratch an uncured finish while you tighten them, even when the wood color looks dry.
Will a clear topcoat change the rustic oak color?
It can. Some finishes warm or deepen the appearance of wood, while others preserve a paler look more closely. The change is influenced by the product chemistry, coating thickness, original oak tone, and earlier stain. A clear label does not mean the completed furniture will be visually identical to the uncoated stain sample.
Make a comparison sample that includes every layer, then view it in both daylight and the lighting used while watching television. If the finish shifts the wood too orange, experiment on a scrap with a different compatible protective product; do not apply another stain over a fully finished cabinet without the manufacturer’s preparation directions.
Final Thoughts
The most reliable route to a diy rustic oak finish on tv stand is to identify the real surface, select a finish that works on it, test the complete stain-and-topcoat combination, and add only subtle weathering. Solid oak, veneer, clear-coated wood, and laminate do not accept the same treatment. Keep structural integrity, drying time, ventilation, safe rag disposal, and TV stability ahead of the distressed appearance; the best rustic makeover still works as dependable everyday media furniture.