Sliding barn doors can give an existing TV stand concealed storage without rebuilding the cabinet. To tackle how to add barn doors to tv stand furniture, first check the cabinet’s strength, then choose hardware made for small furniture, size the doors to the actual openings, and install the rail, rollers, stops, and guides as one matched system. A decorative track alone is not a safe retrofit.
As an Amazon Associate we earn from qualifying purchases.
By KK Home Furnishings Editorial Team
Plan and Measure Your TV Stand Barn Door Retrofit
This is a conversion of a sound, freestanding media cabinet, not instructions for constructing an entire TV stand or creating decorative barn-door ideas. The main decision is whether a track can attach to a reinforced face or upper rail without interfering with the television, drawers, cords, or ventilation. Measure first and buy the rail kit second.
| Material or Tool | Size or Spec to Check | Cost Tier | Substitute or Caution |
|---|---|---|---|
| Furniture-scale sliding-door kit | Approved door thickness, weight, track length, and mounting pattern | Moderate to high | Use only a complete, compatible cabinet kit, not a full-size doorway rail |
| Door panels | Actual opening coverage, material thickness, and mass | Low to moderate | New panels must meet the hardware manufacturer’s dimensional limits |
| Solid mounting backer or reinforcement | Attachment into verified cabinet structure | Low to moderate | Decorative trim or thin particleboard skin is not a structural support |
| Measuring and layout tools | Tape measure, square, level, pencil, and drilling template | Low | A trial layout using painter’s tape can reveal collisions early |
| Drill, appropriate bits, and fasteners | Match hardware holes and the identified cabinet material | Low to moderate | Do not substitute random long screws that may pierce the cabinet top |
| Stops, anti-jump devices, and lower guides | Exactly those supplied or specified for the selected kit | Usually in kit | These are functional retention components, not optional decorations |
Check the Cabinet Frame Before Committing to Sliding Doors
Remove any old doors and inspect the upper face frame, top panel, side joints, center partitions, and shelf supports. A solid-wood rail or a properly reinforced plywood assembly may provide a credible attachment path. A thin foil-wrapped particleboard edge with loose screws, crumbling holes, or a sagging top should not carry new door hardware without a design-specific repair.
Confirm that the television rests on a surface designed for its weight and footprint. Adding a door rail cannot increase the stand’s published TV capacity. If a child can tug an open door, the cabinet also needs a suitable tip-over restraint. The Consumer Product Safety Commission recommends anchoring televisions and furniture to reduce tip-over risks [CPSC, 2025].
Choose Cabinet-Scale Hardware and Match Its Real Limits
Furniture hardware differs from a barn-door kit made for a room doorway. As one verifiable example, Outwater’s FSDH-DD-TOPMNT two-door furniture kit specifies doors no wider than 12 inches each, door thickness from three-quarter inch through one inch, a four-foot rail option, and a published maximum door weight of 44 pounds. Those are limits for that specific product, not universal cabinet measurements.
The same Outwater kit lists two end stops, four anti-jump disks, lower door guides, and four rollers. Its stated mounting-hole spacing is 16 inches on center, so your TV stand may need a suitable structural backer or an alternative model. A rail that looks proportionate can still be too long for the room or incompatible with the existing cabinet’s load path [Outwater, product specifications accessed October 2026].
Map the Sliding Path, Door Overlap, and Existing Features
Record each front opening’s height and width, the cabinet’s full exterior width, and the free space to either side. The doors need enough rail travel to expose the intended compartments; two panels that merely cover their openings in the closed position may still block access when opened. Include handles, door projection, center dividers, drawer fronts, and nearby shelves in your layout.
Use cardboard rectangles or painter’s tape to mock up the closed and open positions. Confirm that the doors will clear the floor or cabinet base and will not catch on controls, cords, or a soundbar. If the stand includes an electric fireplace insert, its own listed installation, airflow, and service-clearance requirements take priority; never let a new panel obstruct them.
How to Add Barn Doors to an Existing TV Stand Step by Step
Work with the TV disconnected and removed from the cabinet so drilling and adjustments do not transfer force into the screen. Gather the actual kit’s installation drawing, not a generic barn-door diagram. The procedure below shows the sequence and decision checks; hole locations, fastening details, and clearances must come from your chosen rail system.
Step 1: Remove Old Doors and Identify Reliable Attachment Points
Unplug the equipment, remove media devices, and empty the front compartments. Detach existing hinged doors and label their screws and hinge plates in case you need to reverse the conversion. Check whether the new doors must cover old hinge mortises, drilled holes, or exposed cabinet edges. Photograph the front face before changing it so you can compare alignment later.
Inspect the construction from inside the cabinet with a flashlight. Identify substantial framing or reinforcement connected to the sides and top, not merely a decorative strip stapled across the face. If the rail’s fastening positions miss reliable structure, pause for a cabinetmaker-approved reinforcement plan. Do not assume that adding washers to weakened particleboard creates an adequate load-bearing connection.
Step 2: Mark Door Coverage and Full Travel Before Cutting
Lay out each door’s final closed position, including how much it overlaps the face frame. Then draw its fully open position, with allowance for the roller, end stop, and handle. Check where the open panel lands: it must not collide with a wall, another door, a side table, or an exterior drawer. Measure the actual cabinet and compare those measurements with the kit’s hardware drawing.
Choose whether the design uses one panel per side, a single moving panel, or a two-door kit with a central opening. A compact TV stand may not have enough side-to-side travel for the first option. If the rail hangs beyond the cabinet width, confirm the projecting segment is supported as the manufacturer intends; do not let a free-floating extension become the only support at the end of travel.
Step 3: Prepare Door Panels for the Exact Hardware
Use flat, stable cabinet-door material whose finished thickness and weight are accepted by the kit. Prepare the wood surface and edge finish before hanging it, but leave hardware contact areas clear of thick coatings. If reusing old doors, examine hinge-hole damage and make sure their height, mass, and shape suit sliding movement rather than assuming any old hinged door can accept a roller bracket.
Mark roller positions using the manufacturer’s template and drill clean, straight holes supported by scrap material when appropriate. Outwater’s FSDH-TOPKT-4-DD installation guide illustrates rollers positioned about five inches from a door edge for its own arrangement; that measurement is not transferable to other kits. Route a lower guide groove only if your selected kit specifies that design and the panel safely accommodates it.
Step 4: Reinforce the Mounting Area and Attach the Rail
Install any structural backer only after confirming how it transfers the door weight into the cabinet’s actual framing. The right connection varies with solid wood, plywood, and engineered panels. Drill pilot holes and use fasteners approved for those materials and the chosen bracket pattern. A short screw into thin surface veneer or a long screw piercing the television shelf is not an acceptable shortcut.
Hold the rail at the specified elevation and use a level to check the entire travel path. Attach the kit’s stops in the order required by its instructions; some systems require stops before the rail is mounted or before the wheels go on. A tilted track can cause the door to drift, rub, or strike an end cap. Recheck every bracket before attempting to hang even an empty panel.
Step 5: Fit the Rollers, Guides, and Anti-Jump Devices
Fasten the rollers to the prepared door panels using the listed bolts, washers, and spacing. Install the lower guides where the manufacturer specifies, keeping them centered on their intended door grooves or guide surfaces. A decorative wheel is not a complete hanging system: the guide controls the swinging panel, the stop controls travel, and anti-jump pieces help retain it on the rail.
Follow the hardware maker’s assembly sequence rather than improvising. The Outwater furniture guide instructs installers to place and lock anti-jump disks and to fit routed door guides after the panels are hung, where that guide style is used. These are model-specific instructions [Outwater, FSDH-TOPKT-4-DD installation guide]. Check that none of the guide screws pierces a shelf into the storage compartment.
Step 6: Hang the Doors and Adjust the Sliding Action
With help as needed, hang one door at a time using the approved lifting and locking sequence. Keep fingers clear of the rail, roller brackets, and closing edges. Slide each panel slowly through its entire intended range with the cabinet still empty. Listen for scraping, watch the gap to the cabinet face, and look for sideward sway; the door should not have to be forced past a cabinet corner.
If a panel binds, investigate level, guide placement, roller alignment, or a warped door instead of removing stops or retention pieces to gain more travel. Check that the doors remain supported and guided when both are fully open and fully closed. A visible gap behind the panels is normal for some exposed-track designs, but any risk of the rollers disengaging calls for correction before use.
Step 7: Restore Electronics Access and Secure the TV Setup
Refit cabinet contents only after the finished doors open far enough to access device ports and ventilation areas. Confirm that the sliding hardware cannot pinch HDMI or power cords, block a receiver’s ventilation slots, or scrape the TV’s feet. If a door covers a soundbar or infrared receiver, test everyday use before calling the conversion finished; a better-looking front is not an improvement if it prevents operation.
Return the TV only if the original stand remains appropriate for its published weight and base dimensions. Secure the television with a compatible mount or anti-tip restraint and anchor the furniture as applicable under CPSC guidance [CPSC, 2025]. Open and close the new doors periodically to inspect fasteners, guide wear, and stop movement; stop using the mechanism if a bracket loosens or the cabinet frame begins to separate.
Frequently Asked Questions
Before treating the job as finished, resolve the practical questions that determine whether the cabinet can still be used comfortably. Small sliding systems offer a striking look, but the best choice is the one that preserves reliable access, safe retention, and easy maintenance with the equipment you actually own.
Can I add barn doors to a TV stand made from particleboard?
Possibly, but not simply by screwing an exposed rail into its thin front edge. Particleboard construction varies, and previously loosened fastener holes are particularly poor attachment points. The rail must be supported by a mounting arrangement appropriate for the actual cabinet, door weight, and loading. If the cabinet is already swollen or joints are loose, replacement may be safer than retrofitting.
Consult the kit’s fastening instructions and, if needed, a cabinetmaker who can inspect the load path. A decorative wood strip glued to the face is not automatically a structural reinforcement. Choose a lighter compatible panel or a different cabinet only after confirming that the existing enclosure can safely support the complete hardware system.
Can barn doors slide in front of existing TV stand drawers?
Yes, if the rail travel allows the doors to move entirely clear of the drawer you need to open. An attractive closed-door photo can conceal an awkward daily arrangement: the drawer might extend into the sliding panel, or the panel’s handle may hit an adjacent surface. Plan the fully open position of both the sliding door and each drawer before drilling.
Test the mock-up with the drawer pulled to its normal service position. Also check that the cabinet’s center divider gives the drawer enough clearance once the lower guide is installed. If the drawer cannot be opened independently, a hinged conversion or a narrower single sliding panel may provide better access than two moving doors.
Are soft-close tracks necessary for cabinet barn doors?
No. Soft-close is a convenience feature, not a substitute for a properly rated rail, stops, guides, and anti-jump retention. If you want quieter closing, select a furniture-scale system that expressly supports a compatible soft-close accessory. Do not add generic damping hardware that changes the travel or prevents the factory stop from engaging correctly.
For a family media cabinet, reliable door control matters more than the appearance of an oversized roller. Check the actual operating instructions for adjustment and maintenance. Some systems are simple to wipe clean and retighten, while others have parts that must remain accessible; do not cover adjustment points with permanently attached trim.
Can I cover an electric fireplace insert with sliding barn doors?
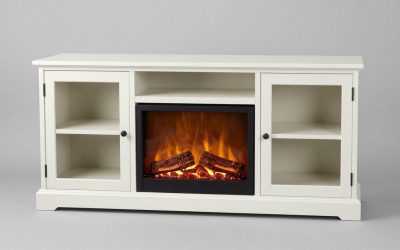
Do not cover the heater’s air inlet, warm-air outlet, controls, or other clearance areas during operation. Whether doors can be installed near the insert depends on the exact fireplace model and its published installation requirements. If the new doors change a listed opening or enclosure dimension, a visually similar media console is not evidence that your conversion is permitted.
Consult the fireplace manufacturer’s current manual and obtain a model-specific answer if the design is unclear. The safest layout may leave the insert permanently exposed and fit barn doors only over separate side-storage compartments. A door that can slide across the firebox opening creates an avoidable operating hazard even if it looks tidy when the appliance is off.
Final Thoughts
The practical answer to how to add barn doors to tv stand furniture is to retrofit a sound cabinet with genuinely compatible small-scale hardware, not just attach attractive rollers. Confirm the full sliding path, secure the rail into suitable structure, retain every guide and stop, and protect the television and equipment access. If the cabinet cannot support those requirements, choose another design.