Key takeaways
- A diy barnwood tv stand starts with two separate decisions: which reclaimed boards are safe to bring indoors, and what cabinet structure can actually support a television. Use sound lumber for the load-bearing case, save weathered barnwood for visible faces,…
A diy barnwood tv stand starts with two separate decisions: which reclaimed boards are safe to bring indoors, and what cabinet structure can actually support a television. Use sound lumber for the load-bearing case, save weathered barnwood for visible faces, and inspect every board before cutting. The aged look should never be the reason to accept a weak joint or an unknown coating.
As an Amazon Associate we earn from qualifying purchases.
By KK Home Furnishings Editorial Team
Plan and Measure Your Barnwood TV Stand
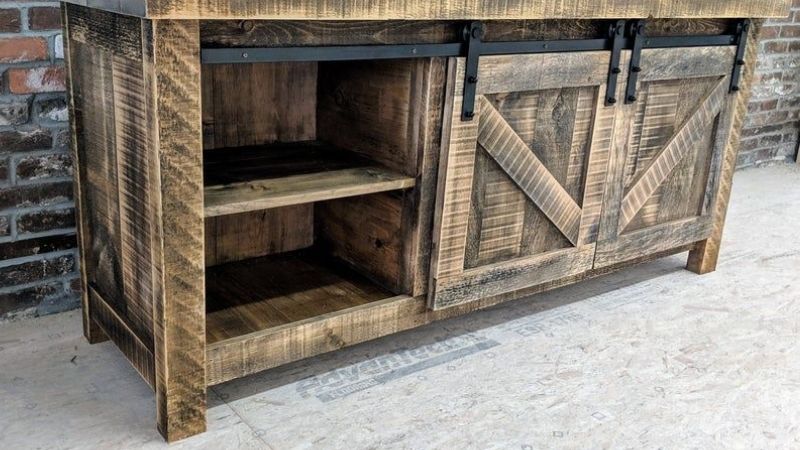
Reclaimed barnwood differs from a new lumberyard board: no two pieces necessarily share a thickness, moisture history, coating, or usable length. First sort what you own and decide which boards are decorative. Then size a cabinet around the actual television support footprint. The plan below deliberately avoids sliding tracks, since a barn door TV stand is a different construction project.
Choose Barnwood With a Known, Suitable History
Ask the supplier where the wood came from and whether it was previously painted, pressure-treated, exposed to chemicals, or used outdoors near machinery or livestock. Weathered color by itself does not tell you that a board is clean. Reject lumber with soft rot, active insect evidence, a strong chemical odor, or a finish that has not been assessed for indoor use.
Older painted wood deserves particular caution. The EPA warns that disturbing lead-based paint can create hazardous dust, especially on components from buildings built before 1978 [U.S. EPA, 2026]. Do not dry-sand, plane, or saw suspect coatings to create a rustic finish. Have the finish assessed by a qualified professional and choose clean, documented stock if its history remains uncertain.
Measure the Television and Establish the Load Path
Measure the TV feet or center-base footprint, the unit weight from its manual, and the position of connections at the rear. These measurements matter more than a marketed screen diagonal. A television resting on the cabinet must fit entirely on a suitable top. The cabinet also needs a defensible load path from top to dividers, side panels, base, and floor.
For perspective, a Kreg-hosted four-door media-console plan builds the case from 3/4-inch hardwood plywood and uses a separate 1/4-inch plywood back panel [Kreg Tool, plan accessed October 2026]. Those numbers describe one documented plan, not a published load rating for your reclaimed lumber. A repaired barn plank or attractive nail-hole pattern does not certify its bending strength.
Plan for Wood Movement and the Right Rustic Finish
Reclaimed solid wood can still expand or contract as room humidity changes. The USDA Forest Products Laboratory explains that wood moisture tends toward the surrounding environment and that moisture changes influence dimensions [USDA Forest Service, 2010]. Keep old boards in the intended indoor conditions until their readings and dimensions stabilize rather than assuming age prevents movement.
Decide whether the gray patina will appear only on front panels, on the top as well, or on a removable decorative skin. Select the clearest, flattest surfaces where the television base will touch. Put deeply cupped, checked, or uneven boards where appearance matters but precise flatness does not. Finish and fasten them in a way appropriate to solid wood.
| Material or Tool | Size or Spec | Cost Tier | Substitute |
|---|---|---|---|
| Reclaimed barnwood | Known-origin, clean and structurally sound boards | Variable | Clean, kiln-dried reclaimed boards from a specialist |
| Cabinet plywood | 3/4-inch hardwood plywood in cited Kreg case plan | Core material | Other engineered cabinet stock specified by a verified plan |
| Back panel | 1/4-inch plywood in cited Kreg media-console plan | Core material | Back and bracing arrangement from an equivalent proven plan |
| Moisture meter | Device matched to wood species and calibration instructions | Helpful tool | Have a lumber shop assess board moisture |
| Metal detector and pulling tools | Inspect for embedded nails, screws and staples | Safety tool | Professional reclaimed-lumber preparation |
| Wood glue, suitable screws and clamps | Select for the actual joint, panel and wood condition | Assembly supplies | Joinery called for in an established cabinet plan |
How to Build a Barnwood TV Stand Step by Step
The safest way to preserve the reclaimed look is to separate decoration from structure. Build a square cabinet using materials and joints supported by a credible plan, then attach sound barnwood as a face, door skin, or appropriately supported top. Each stage has a stop condition: if origin, coating, moisture, or load behavior remains unknown, resolve it before proceeding.
Step 1: Sort, Clean, and Inspect Every Salvaged Board
Lay the boards out on sawhorses and record usable lengths, visible defects, and which faces have the finish you want to keep. Remove loose debris with an appropriate brush and inspect both sides and edges under good lighting. Check for exposed fasteners, metal fragments, splits through knots, soft patches, and worm holes with fresh dust nearby.
Use a suitable metal detector on each piece before it approaches a saw blade or planer. Pull accessible nails and staples with proper tools, but do not keep cutting through a board where buried metal cannot be located or removed. Woodworking guidance on reclaimed materials emphasizes hidden metal because it can damage cutters or be thrown during machining [DriftwoodCo, 2026].
If a painted surface might contain lead, set that board aside for professional assessment. The same applies to lumber suspected of chemical treatment or contamination. Mark accepted pieces for either structural or decorative use; a beautiful, weakened plank belongs in neither role unless a professional determines an appropriate safe reuse.
Step 2: Acclimate the Lumber and Prepare Flat Reference Edges
Store approved wood off the floor with spacers so air can circulate, away from leaks, heaters, and direct sun. Take repeat moisture readings in several locations, following the meter maker’s species and calibration guidance. Compare readings with wood already acclimated to that same room instead of imposing a single supposedly correct moisture percentage on every region and season.
Choose a safe sequence for straightening and sizing boards. One straight reference edge makes later fitting easier, but an old split or knot may limit where cuts can be made. Mill only boards with a known clean surface, no hidden metal, and no suspected hazardous coating. Use dust collection and appropriate personal protective equipment for ordinary woodworking.
Lay the weathered faces together before cutting to finished length. A batch of boards that looked consistent in a stack can display very different colors once arranged on a broad cabinet front. Shift the pieces until the texture feels balanced, then mark their positions on the back. Preserve irregular edges where they will not interfere with a joint or device clearance.
Step 3: Build a Rigid, Supported Cabinet Carcass
Cut the cabinet sides, bottom, internal divider, and top-support rails according to a verified cabinet plan adapted to the TV’s real footprint. A plywood carcass is often more predictable than an entire box assembled from uneven barn planks. The Kreg four-door media-console example uses 3/4-inch plywood for the main structure and makes the smaller back a separate component [Kreg Tool, plan accessed October 2026].
Dry-fit the cabinet on a level work surface and confirm that the openings are square before permanently joining it. Use the screws, glue, pocket-hole settings, and edge spacing appropriate to the panel material and chosen plan. Put supports beneath the actual region where the television feet will load the top, not only behind the decorative front trim.
Include a back or bracing scheme that resists the cabinet racking sideways. A thin panel can serve as part of a documented design, but its thickness alone does not prove the stand can bear a particular TV. Leave any rear cable openings clear of structural rails, and retain the equipment maker’s ventilation space. A low cabinet full of gaming devices still needs airflow.
Step 4: Fit the Barnwood Top Without Trapping Movement
If the top will be solid reclaimed boards, select pieces with sound fibers and a stable, flat support surface. Join boards only after their edges have been properly prepared and the intended assembly method is suitable for their condition. A single heavily checked plank should not become the television’s sole contact surface merely because its weathering looks attractive.
A practical alternative is a cabinet-grade top with decorative barnwood arranged where it cannot undermine the support footprint. For a true solid-wood top, follow an established tabletop attachment method that allows seasonal cross-grain movement. The USDA Wood Handbook explains why changes in moisture alter wood dimensions; rigid fastening across an unrestricted wide solid-wood panel can encourage splitting or cupping [USDA Forest Service, 2010].
Before finishing, place a cardboard tracing of the TV base on the intended top and check support and clearance. Observe whether any board rocks, whether fastener heads protrude, and whether the top deflects under a non-electrical test arrangement approved by the project designer. Do not use a live television as a makeshift proof-load device or infer a weight rating from a visual inspection.
Step 5: Attach the Rustic Facing and Seal the Usable Surfaces
Arrange approved barnwood on the cabinet front and mark joints so the planks do not block drawers, vents, or service access. Decorative facing can be fixed to suitable battens or panels using an attachment scheme that matches its thickness and expected movement. Do not shoot long nails blindly through the face where cables, hinges, or unsupported edges could be hit.
Use a finish compatible with the cleaned wood and its existing surface, following the manufacturer’s instructions about preparation, ventilation, application, and cure. Distressed color need not mean a rough contact surface; soften sharp edges and splinters on handles and reachable corners without sanding a potentially hazardous original coating. Let finishes cure before placing electronics inside.
Test drawers and doors for full travel and make sure cabinet ventilation remains open. Reserve lower enclosed areas for objects that do not generate heat if the ventilation requirements of receivers or consoles cannot be met. Keep cables away from sharp reclaimed edges by using properly installed cable pass-through hardware rather than allowing cords to rub on rough lumber.
Step 6: Anchor the Cabinet and Verify the TV Arrangement
Set the cabinet on a level surface and check that all feet or base rails contact the floor. Evaluate whether the room needs additional floor protection and whether the cabinet sits securely against the wall. A thick, heavy top can move the center of mass upward, so greater material weight is not automatically the same as safer furniture.
The Consumer Product Safety Commission advises securing TVs and furniture against tip-overs, and specifically says a TV not mounted on a wall still needs a restraint [CPSC, 2026]. Select anchoring hardware appropriate to the wall structure and cabinet attachment points; do not connect the restraint only to an old decorative faceboard. Keep desirable toys and remote controls away from tempting elevated positions.
Finally, compare the assembled furniture against the television manual and the cabinet plan. The TV feet must be supported, the top must have a verified design for the expected load, and ventilation and cord routing must remain safe. If there is no credible way to establish the homemade stand’s capacity, put the television on a properly installed, compatible wall mount and treat the barnwood console as storage.
Frequently Asked Questions
The remaining choices usually depend on how much of the original appearance you want to preserve and whether your supply of reclaimed boards is consistent. These questions help resolve common material problems that are not solved by the cabinet assembly order alone.
Can Painted Barnwood Be Used Without Removing Its Old Finish?
Sometimes, but only after the existing finish has been appropriately identified and judged suitable for indoor use. A weathered coating with an unknown origin should not be treated as harmless. Lead exposure is an especially important consideration for paint from structures built before 1978; the EPA recommends qualified assessment and lead-safe handling [U.S. EPA, 2026].
Leaving a coating in place does not automatically make it safe in a room where people touch the furniture or where paint may flake. Avoid sawing through or dry-sanding a suspect layer. If a professional cannot establish an appropriate use and finish strategy, choose clean unpainted reclaimed stock or modern boards with a new distressed finish instead.
What If Reclaimed Boards Have Tiny Insect Holes?
Old holes do not necessarily prove an active infestation, but fresh fine powder, new exit holes, or weakened, crumbly surfaces call for closer inspection. WOOD Magazine describes how some wood-boring insects leave small holes and powderlike material; treatment depends on the insect and condition of the wood [WOOD Magazine, 2016].
Keep suspicious boards isolated from indoor furniture and seek advice from a qualified wood-products or pest professional before bringing them inside. Do not assume ordinary household spray, sun exposure, or a decorative clear coat reliably removes insects. Even if activity has ended, excessive internal tunneling may leave the wood unfit for important joints or load-bearing members.
How Many Barnwood Planks Will I Need for the Front?
That depends on the visible area, usable board widths, and how many pieces must be rejected because of cracks, old hardware, or defects. Lay a full-size cardboard or paper outline of the cabinet face on the floor, then arrange your accepted boards within it. This reveals shortfalls and color mismatches more reliably than shopping by nominal plank width.
Keep a few sound offcuts for patches or matching later, but do not treat a heavily damaged board as usable simply to avoid buying another piece. If the lot is thin, concentrate the best barnwood on the doors or front strips and use a clean structural material for the less visible case. That preserves the design without requiring every surface to be reclaimed.
Can I Put a Television Directly on a Rough Barnwood Top?
Only when the surface is flat, stable, safely finished, and part of a cabinet with a defensible TV support capacity. Deep ridges or protruding fasteners can make a TV foot sit unevenly, while cracks and weak joints complicate the load path. Do not mistake a broad rustic top for certified support of an expensive, heavy screen.
For a surface that will frequently be cleaned or touched, consider using a sound, smooth cabinet top with reclaimed trim around its visible edges. Consult the TV manual before adding any pads or shims that alter its designed base contact. When the stand itself has no verified capacity, a proper wall mounting system provides a clearer separation between display support and rustic storage.
Final Thoughts
A successful diy barnwood tv stand earns its rustic character from documented, clean reclaimed wood and its reliability from a separately planned structure. Keep a record of your board source, moisture readings, finish, and TV support decision. If the history of the lumber or capacity of the finished case cannot be verified, choose safer material or wall-mount the television.