Key takeaways
- A good chair setup starts with the work you actually do, not with a perfect-looking sitting pose. Begin by matching your seat height to the keyboard, supporting your feet, and bringing the backrest into comfortable contact. This ergonomic chair setup…
A good chair setup starts with the work you actually do, not with a perfect-looking sitting pose. Begin by matching your seat height to the keyboard, supporting your feet, and bringing the backrest into comfortable contact. This ergonomic chair setup guide follows an order you can repeat whenever you change desks, chairs, or users.
As an Amazon Associate we earn from qualifying purchases.
By KK Home Furnishings Editorial Team
Check Your Desk and Chair Before Adjusting Anything
First, sit at the desk with the keyboard and mouse in their normal working positions. Place your feet where they naturally land and look at the screen without trying to hold a rigid posture. The baseline tells you which adjustment is needed; a control should solve a specific mismatch, not be moved merely because it exists. OSHA treats the chair, work surface, input devices, and monitor as one workstation [OSHA, Computer Workstations eTool, accessed October 2026].
| Setup check | What to look for | What to adjust first | When to change another item |
|---|---|---|---|
| Typing position | Shoulders relaxed; elbows close; wrists reasonably straight | Chair height relative to keyboard | Use an adjustable desk or keyboard tray when surface height blocks a workable fit |
| Feet | Both feet stable on floor or footrest | Seat height and foot placement | Add a stable footrest if typing height leaves feet unsupported |
| Seat depth | Thighs supported without front edge pressing behind knees | Seat slider or adjustable back position, if provided | Try a differently sized chair if the seat is fundamentally too long or short |
| Lower back | Backrest contact without a hard pressure point | Backrest height, lumbar location or firmness | Recheck effective seat depth if you must perch forward |
| Recline | Back can move in a controlled way suitable for the task | Available tilt resistance or travel limit | Use the model guide if a control is unclear or unavailable |
| Armrests | Shoulders relaxed; chair can reach the desk | Arm height, width and position | Lower or remove obstructing arms when the design permits |
| Screen and mouse | Screen view is natural; mouse is reachable without stretching | Device positions after chair is set | Separate laptop screen from keyboard for longer work sessions |
Set the Work Surface as Your Reference Point
If the keyboard is much higher than your relaxed elbows, simply lowering the chair until your feet touch the floor may leave your shoulders raised while typing. If the keyboard is very low, pushing the chair up without evaluating leg clearance may create a different problem. The aim is a working relationship between hands, elbows, and the keyboard rather than a predetermined chair-height number.
OSHA advises keeping elbows about level with the keyboard, shoulders relaxed, and wrists from bending excessively during typing [OSHA, Keyboards]. At a sit-stand desk, set the seated desktop height before adjusting the chair around it. At a fixed desk, use the chair’s available range first, then consider whether the keyboard position itself needs to change.
Identify Which Controls Your Particular Chair Has
Look beneath the seat and alongside the back for the controls listed in your chair’s instruction manual. A seat-height lever, sliding seat, backrest height adjustment, lumbar pad, tilt-resistance dial, and tilt limiter are separate functions. You may have only some of them. The label, location, and direction of each control are specific to the product, so do not copy a random video for a different model.
Before making a major change, note the starting settings. Make one adjustment, sit back down, and test it during a normal task. A chair that moves easily under no load may respond differently once you are seated. Do not force stuck mechanisms or disassemble a gas-lift cylinder; refer to the manufacturer or qualified service provider if a control does not work as described.
Decide Whether You Need Foot Support or More Clearance
Your feet need a stable surface while you work. If reaching the keyboard requires raising the seat enough that your heels no longer rest comfortably, a sturdy footrest can support the feet. It does not fix every desk-height problem, however. A high keyboard can still cause elevated shoulders, and a desk drawer can obstruct the thighs even with a footrest in place.
OSHA specifically describes a footrest as an option when a seat must remain elevated to match the workstation, while Mayo Clinic also recommends preserving space for legs and feet [OSHA, Chairs; Mayo Clinic, 2023]. Use a flat, steady support that will not slide away; avoid relying on unstable stacks or objects that tip whenever you reposition your legs.
Ergonomic Chair Setup: Six Steps in a Practical Order
Follow these actions while seated in the chair and using your usual desk. Each step has an observable check rather than a universal angle, height, or posture target. The final setting can vary between people, desk heights, footwear, and tasks. If one step cannot be completed within the chair’s adjustment range, keep that limitation visible instead of compensating with an awkward position elsewhere.
Step 1. Match Seat Height to Your Keyboard
Start by bringing the seat to a height where you can type with your shoulders relatively relaxed, upper arms near your sides, and hands at a comfortable level. Rest your fingers lightly on the home row rather than holding them in the air. If your forearms angle sharply upward to reach the keys, the keyboard may be too high relative to your elbows. If you must shrug, investigate the desk height before settling.
Now check your feet. They should rest reliably on the floor or a footrest without forcing your thighs into the desk. This may require choosing a sensible compromise on a fixed-height work surface or adding an appropriate keyboard tray. Mayo Clinic recommends keeping hands at or slightly below elbow height and feet supported [Mayo Clinic, Office Ergonomics, 2023].
Step 2. Set Seat Depth So You Can Use the Backrest
Scoot back into the chair instead of balancing on the front of the seat. If there is a seat-depth slider, move the seat pan until most of your thighs are supported but the rounded front edge does not press into the backs of your knees. Your lower back should still be able to meet the backrest. The goal is both usable thigh contact and room to move the knees freely.
Some chairs adjust effective seat depth by shifting the back instead of sliding the seat. Others have no depth control at all. If the seat is too long for your legs, placing the feet farther forward does not correct a backrest you cannot reach. OSHA calls for support without pressure behind the knees and recognizes the need for different chair sizes [OSHA, Chairs].
Step 3. Bring the Back and Lumbar Support Into Contact
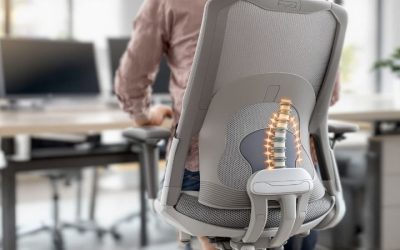
With your hips toward the rear of the seat, adjust the backrest or lumbar support only as far as the chair permits. Find a setting that meets the lower back without a sharp pressure point or a feeling that the pad pushes you away from the seat. Some designs have a movable lumbar pad; others rely on a shaped backrest or adjustable back height. The support should suit your body rather than a marketing diagram.
Lean lightly into the back for a short work pause, then return to typing. You should not need to hold your torso rigidly to keep contact. An overly prominent support can be as distracting as too little contact. If the pad is fixed and clearly misses your lower back, record that fit problem; tightening unrelated arm or tilt controls will not reposition a fixed support surface.
Step 4. Set Recline Resistance for Controlled Movement
Test a small backward movement while seated and with the chair on a stable surface. If your chair has a tension control, adjust it following the model guide until reclining feels neither abrupt nor unusually difficult. A tilt limiter or stop may restrict how far the back moves, but it is not the same control as resistance. Some chairs use automatic mechanisms and have no user-operated tension dial.
Set the movement to match the task: typing may call for a more upright working position, while reading may be more comfortable with some back support at a different angle. Do not force a lock or assume the chair can freeze at every position. This step is about selecting usable chair movement, not proving that one fixed back angle is healthier than all others.
Step 5. Position Armrests Without Blocking Desk Access
Relax your shoulders and let your elbows fall close to your sides. Bring adjustable armrests up only until they offer light forearm support without making the shoulders rise. Where the arms adjust inward or outward, position them so your elbows can remain close without being squeezed. Test typing and mousing rather than judging armrest fit with your hands in your lap.
Next, roll the chair gently toward the desk. If tall armrests hit the desktop and force you to reach forward, lowering them may be the better setting even if you use the pads less. OSHA notes that armrests should support the forearms without interfering with access to the work surface [OSHA, Chairs]. Fixed armrests that block the desk are a chair-design limitation, not a reason to stretch your arms farther.
Step 6. Verify the Screen, Mouse, and Real Work Routine
Keep the chair in its new setting and check the rest of your work area. Place the mouse close to the keyboard, move frequently used objects within comfortable reach, and adjust the display so you can view it without routinely craning the neck. For a laptop used over long sessions, an external keyboard and pointing device can allow its screen to be lifted without raising your typing position.
Try a few minutes of real work, then move, stand, and return. Notice whether you keep sliding forward, stretching toward the keyboard, or sitting with one foot dangling. Those observations tell you whether to revisit a specific step. Mayo Clinic recommends comfortable monitor placement and accessible input devices, but your workable view can also depend on corrective lenses and screen size [Mayo Clinic, 2023].
Frequently Asked Questions
Can You Set Up an Ergonomic Chair Without a Seat-Depth Adjustment?
Yes, if the fixed seat depth already fits you. A dedicated slider is helpful for accommodating more body sizes, but it is not essential for every person. The important test is whether your thighs receive adequate support while your back reaches the backrest and the seat edge stays clear of the backs of your knees.
If that combination is impossible, look for a chair with a different seat dimension rather than forcing an uncomfortable posture. A pillow behind the back may change the effective depth temporarily, but it can also alter lumbar contact and stability; it is not equivalent to a properly sized seat.
Is a Headrest Necessary for a Computer Desk Chair?
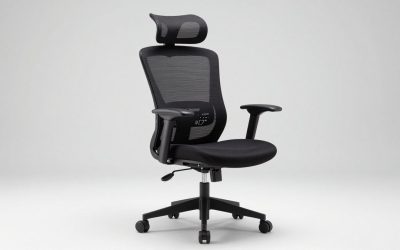
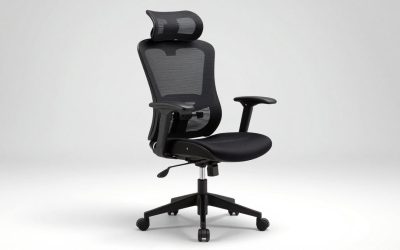
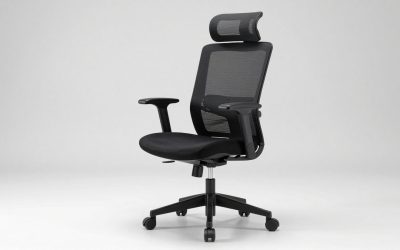
No. A headrest is not a universal requirement for normal computer work. Some people prefer head support when reclining to read or take a break, while others find a protruding headrest pushes the head forward during upright tasks. Its usefulness depends on the chair design and the positions you actually use.
If your chair has an adjustable headrest, assess it in the supported positions intended by the manufacturer. It should not force your chin downward or prevent you from using the backrest comfortably. Avoid choosing a chair on the assumption that more support attachments automatically mean a better fit.
Can Two People Share the Same Chair Settings?
Usually not without some readjustment. People can differ in leg length, torso height, reach, and preferred recline resistance even if they are similar in overall height. A shared desk adds another variable: each person needs a workable relationship between the keyboard and the chair, not just a memorized seat-height position.
A practical shared-workstation habit is to record the settings each person actually uses or to keep a short personal sequence. Adjustments should remain easy to operate and repeat. If one chair never fits a particular user despite available controls, the problem may be its dimensions rather than a missed setting.
Should You Change Chair Settings for Writing by Hand?
Possibly. Handwriting, drawing, or reviewing papers may involve a different reach and viewing angle from keyboard work. You may need to reposition the task materials or change how you use the backrest. That does not mean the chair must be raised and lowered every time a task changes; the work surface and materials can sometimes be adjusted instead.
Recheck reach and shoulder comfort when tasks change. Move materials closer when possible, and use chair adjustments if they solve a specific task mismatch rather than trying to hold one pose all day.
Final Thoughts
Use this ergonomic chair setup sequence as a repeatable fit check, not a rigid posture rule. After you finish adjusting, note the one problem that remains during real typing or reading. If the keyboard is too high, the seat is the wrong depth, or armrests block the desk, another workstation change may matter more than another turn of the chair controls.