Key takeaways
- A sturdy oak console starts with a measured cabinet plan, not a stack of attractive boards. This guide explains how to build an oak tv stand with oak-veneered plywood, reliable case supports, finished edges, and a carefully attached top instead…
A sturdy oak console starts with a measured cabinet plan, not a stack of attractive boards. This guide explains how to build an oak tv stand with oak-veneered plywood, reliable case supports, finished edges, and a carefully attached top instead of treating every wide part as a solid plank.
As an Amazon Associate we earn from qualifying purchases.
By KK Home Furnishings Editorial Team
Plan and Measure Your Oak TV Stand
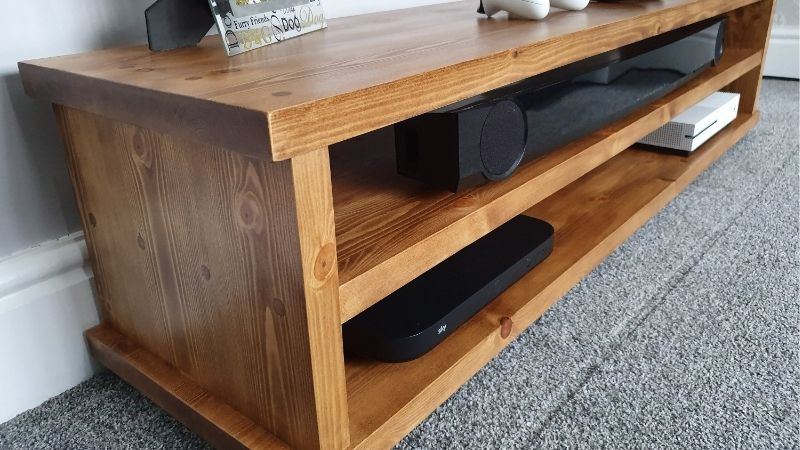
Choose a floor-standing open-front cabinet as the baseline build: a top, bottom, two side panels, a center divider, a back panel, and a supported base. This is a different project from building sliding doors or a wall-mounted floating console. The measurements below illustrate one configuration, not a load-tested furniture design.
| Material or Tool | Size or Spec | Cost Tier | Substitute |
|---|---|---|---|
| Oak-veneered cabinet plywood | Nominal 3/4-inch sheet for case panels | Mid to high | Cabinet-grade hardwood plywood with oak face veneer |
| Back panel | 1/4-inch plywood or specified cabinet back | Low to mid | Thicker back if a compatible plan calls for it |
| Oak edge material | Solid-oak strips or oak veneer banding | Low to mid | Pre-glued oak iron-on edge banding |
| Cabinet joinery | Wood glue and cabinet-appropriate screws | Low to mid | Dowels or dados with suitable tooling |
| Cutting and checking tools | Saw guide, clamps, square, drill, and tape | Mid to high | Accurately cut panels from a sheet-goods supplier |
| Solid-oak top connection | Figure-eight clips or purpose-made Z-clips | Low to mid | Plywood top bonded or fastened per cabinet plan |
| Finish materials | Abrasives, stain if desired, and compatible clearcoat | Low to mid | Clear water-based cabinet-grade finish |
Choose Real Oak Where It Improves the Build
Oak-veneered plywood keeps wide cabinet sides and shelves relatively predictable while showing real oak grain on exposed surfaces. Solid red or white oak works especially well as visible edging, trim, legs, or a separately attached top. Unlike a printed oak-look laminate, genuine veneer can accept an appropriate wood finish, provided it is not sanded through.
Red oak usually has a warmer, pinker cast, while white oak often leans more neutral or olive; color alone is not a reliable way to identify species. Both are workable furniture woods, but solid planks change dimension with humidity. Use sheet goods where panel stability matters and accommodate seasonal movement on any wide solid-wood top [The Wood Database, accessed 2026].
Measure the Television, Equipment, and Room First
Check the TV maker’s stated weight, the exact footprint of its feet or center stand, and any restriction on the supporting furniture. Then measure available wall width, console depth, sight lines, outlet position, and how far cabinet doors or drawers would project. Do not assume the screen’s diagonal size tells you how wide the TV base actually is.
Also inventory game consoles, receivers, routers, and soundbars. Identify their ventilation and cable-clearance requirements from the equipment manuals, leaving access for future repairs. A neatly closed back that traps heat or crushes power cords is poor design. If the television exceeds your ability to verify support, use a rated stand or a professionally designed build.
Set a Cut Plan Around an Honest Support Path
For a simple planning example, picture a case approximately 60 inches wide, 16 inches deep, and 19 inches tall before its base. Two 60-inch-wide top and bottom panels with two side panels and a central vertical divider can create open storage bays. These are illustrative layout dimensions, not a tested safe capacity or a universal cut list.
With nominal three-quarter-inch case plywood, side and center panels about 17 and a half inches tall can sit between the full-length top and bottom. Their position and the base below them must be designed so weight travels through supported vertical members instead of a long unsupported shelf. Adapt every piece to actual material thickness and the TV manual.
How to Build an Oak TV Stand Step by Step
Build the case first, finish the visible oak surfaces next, and install the electronics only after the structure and finish are ready. Each step assumes a floor-standing cabinet with open bays rather than sliding cabinet doors. The exact fastener pattern, saw setup, and any load-bearing connection must match your wood, joinery system, and measured plan.
Step 1: Draw the Cabinet and Create a Cut List
Sketch a front elevation, side view, and top view. Show the television’s feet, every vertical support, the back, and the base that reaches the floor. Label each panel by its finished position and wood-grain direction. Leave enough depth for equipment plugs and rear cables. Decide whether the upper surface will be oak plywood or a separate solid-oak panel.
For the 60-inch illustrative case, lay out a matching top and bottom, two outer sides, a center partition, and a back that suits your chosen attachment method. A back applied across the case adds its own thickness behind the stated body depth. Do not transfer dimensions blindly from a web plan: Kreg’s published TV stands use different layouts and material lists.
Step 2: Break Down Oak Plywood into Accurate Panels
Place the sheet on reliable support and use a straightedge guide or track saw to break it into manageable pieces. Orient the visible oak grain consistently before marking final cuts. Confirm that matching top and bottom panels are identical and that the sides and divider share the same height. A miscut vertical panel can twist the entire box when clamped together.
Cut with a blade appropriate for veneered sheet goods, protect the exit face, and keep hands clear of the cutting path. A supplier can make the large straight cuts if transporting a full sheet is difficult. Mark the good face and final edge on every component. Save offcuts for testing the stain, topcoat, and pilot-hole settings before touching visible furniture parts.
Step 3: Prepare Edges and Dry-Fit the Parts
Cover exposed plywood edges with oak veneer banding or fitted solid-oak strips. Pre-glued edge banding is especially convenient on straight cabinet fronts; follow its bonding and trimming directions and avoid excessive heat that damages the veneer face. Solid edging needs clean, well-fitted glue joints and clamps. Do not let edging change the planned fit of a shelf.
Stand the sides and center divider between the top and bottom without glue. Check squareness, clamp placement, alignment of front edges, and clearance for rear wiring. Mark every joint while the case is accessible. If a shelf or receiver bay proves too narrow, correct the plan now rather than carving away a support after the cabinet has been assembled.
Step 4: Join the Carcass and Verify It Stays Square
Use a suitable cabinet method such as properly located pocket screws, dowels, or dado joints, following the tool and screw manufacturer’s recommendations for your actual sheet thickness. Kreg’s published TV-stand builds use three-quarter-inch plywood with supported internal panels and compatible pocket-hole joinery; they do not establish a load rating for your altered design.
Clamp one side to the bottom, install the center divider, fit the other side, and seat the top in the order your joinery allows. Check both diagonals and front alignment before the adhesive cures. Keep glue off areas that will later receive stain. If a screw spins without holding, remake the joint with a sound attachment method rather than hoping the back panel will hide it.
Step 5: Fit the Back and Build a Supported Base
A properly attached plywood back helps the cabinet resist racking, but it must be fastened to a sound frame. Cut cable pass-through openings where the equipment actually needs them, with smooth edges and enough room to remove plugs. Preserve broad areas of backing around the openings. Do not cut away the central support merely to make wiring easier.
Use a continuous plinth or another structurally suitable base that carries the side walls and center divider down toward the floor. Decorative feet added only near the corners can leave a loaded center partition without a clear support path. Before attaching trim, put the unfinished cabinet on a level surface and check for rocking, sagging, and gaps at every joint.
Step 6: Attach the Top and Finish the Oak
If the top is oak-faced plywood, it can be attached according to your cabinet plan. A wide solid-oak top needs a different connection: seasonal movement across its grain should not be trapped by a rigid row of screws or glue along its full width. WOOD magazine and Rockler document movement-friendly figure-eight fasteners and Z-clips for suitable furniture framing.
Sand real oak carefully and follow the exact stain or clearcoat manufacturer’s schedule. General Finishes advises suitable raw-wood preparation, complete drying between products, and keeping finish away from glue joints. Test the whole finish system on an offcut. Handle solvent-wet staining rags according to the product’s fire-safety instructions instead of leaving them in a pile.
Step 7: Place the TV, Manage Cables, and Inspect the Stand
Allow the coating to reach the maker’s stated handling or service condition before putting electronics on it. Route power and signal cables through protected openings without pinching them behind the cabinet. Leave equipment vents open. Check that the television’s actual base is completely supported and that the cabinet does not rock under normal contact with its doors or shelves.
The CPSC advises using furniture designed for televisions, securing TVs against tip-overs, and anchoring furniture where appropriate [CPSC, 2025]. Your homemade stand has no published weight capacity unless its design has been independently verified. When capacity, joint strength, or wall attachment is uncertain, ask a qualified woodworker or engineer rather than inventing a safe pound limit.
Frequently Asked Questions
Most build questions come down to material selection, seasonal movement, and how much customization is practical. These answers address common decisions a first-time oak-cabinet builder still needs to make after following the core assembly sequence, without replacing the measurements or equipment-manual checks required for a specific television.
Is Oak Plywood Better Than Solid Oak for a TV Stand?
Oak plywood is often the more practical choice for broad cabinet sides, shelves, and backs because its layered construction resists the same kind of cross-grain movement seen in wide solid boards. Its oak veneer gives the surface a genuine wood appearance. Solid oak remains useful for edges, trim, doors, or an intentionally separate decorative top.
Neither material guarantees adequate TV support by itself. Cabinet strength depends on panel spans, joint design, partitions, fasteners, and base construction. Veneer also limits how aggressively you can sand a surface later. If you want a deeply profiled solid-oak edge, use solid hardwood trim instead of routing deeply into a thin veneer-faced sheet.
Can I Make the Entire Stand from Solid White Oak?
Yes, an all-solid white-oak build is possible, but it needs joinery designed to account for wood movement. Wide side panels, tops, and backs cannot always be restrained like plywood without inviting cupping or splits. Frame-and-panel construction and a movement-friendly top attachment are common ways to accommodate the changing width of solid boards.
Solid oak also requires careful selection of dry, straight stock and may increase milling, clamping, and tool demands. White oak is not automatically stronger as a finished cabinet simply because its boards feel dense. Builders who lack milling equipment can often get the oak look and useful stability with quality oak-faced plywood plus genuine solid-oak edging.
Should I Put Cabinet Doors on My Oak TV Stand?
Doors are optional. Open bays keep game consoles and receivers accessible and make it easier to observe blocked vents or tight cables. Hinged doors can conceal storage, but their hinges need correct setbacks, sound mounting edges, and room to swing. A glass-front design may suit equipment that requires a clear infrared remote-control path.
If you prefer doors, decide on them during the drawing stage because their thickness and swing affect bay dimensions. Do not assume decorative barn-door tracks can be attached to any newly built case; those require compatible hardware and verified structural attachment. Detailed door fabrication belongs in a separate cabinet-door guide rather than this basic oak case build.
How Do I Keep the Finished Oak Stand Looking Good?
Dust with a soft cloth and clean according to the coating manufacturer’s instructions, not simply according to the wood species. Wipe up spills promptly, protect the top from persistent heat or moisture, and avoid dragging electronic devices across it. Water-based clear finishes and oil-based finishes may look different and demand different maintenance methods.
For a scratched finish, identify the actual product and determine whether it allows a localized repair or needs a larger surface recoated. Test any cleaning or touch-up method on a hidden area. Inspect cabinet joints and the base periodically, especially if the TV or components change. Refinish cannot correct a loose divider, sagging shelf, or insecure television.
Final Thoughts
When learning how to build an oak tv stand, make the support structure trustworthy before choosing decorative details. Oak-veneered plywood, a supported center divider, carefully finished oak edges, and sound cable management offer a sensible starting point. Keep every TV weight and fit decision tied to your real equipment, not a generic drawing.