Key takeaways
- The cleanest way to add a soft glow to your media console is to mount a compatible LED strip out of direct view, keep its power equipment accessible, and secure the cable before turning anything on. This guide explains how…
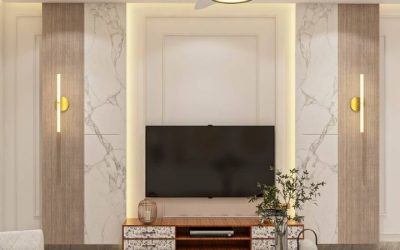
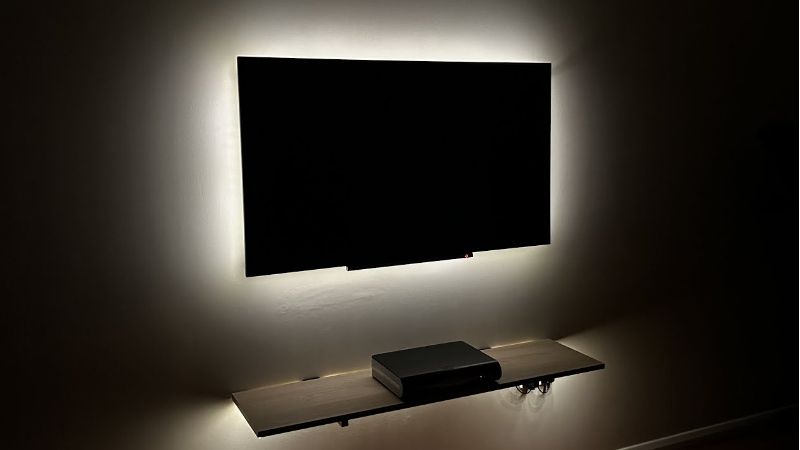
The cleanest way to add a soft glow to your media console is to mount a compatible LED strip out of direct view, keep its power equipment accessible, and secure the cable before turning anything on. This guide explains how to put led lights on tv stand surfaces in six practical steps, from choosing an indirect-lighting location to testing the finished installation. You do not need to modify the television, drill through furniture, or buy a smart-home system to get a tidy result.
As an Amazon Associate we earn from qualifying purchases.
By KK Home Furnishings Editorial Team
Plan and Measure Your TV Stand Lighting Setup
Before peeling off any adhesive, work backward from the effect you want to see. A strip hidden along the rear edge can wash the wall with light; one mounted beneath an overhanging shelf can create a subtle floor glow. Trace the intended route with the console in place, identify where the adapter will plug in, and check whether doors, drawers, ventilation slots, or wall anchors cross that path. The parts below form a practical preparation checklist, not a universal shopping list for every kit.
| Material or Tool | Size or Spec | Cost Tier | Substitute |
|---|---|---|---|
| Indoor LED strip kit | Length to match the measured route; cutting and extension rules vary by model | Budget to premium | Pre-sized LED light bar for a short shelf |
| Matched power supply | Output, connector, and capacity specified for the exact strip | Usually included | Approved replacement from the same system |
| Controller or inline dimmer | Compatible with the strip’s LED type and connector | Basic to smart | Kit-supplied manual controller |
| Strip clips or LED channel | Compatible strip width and cabinet mounting surface | Budget to moderate | Manufacturer-approved adhesive backing |
| Cleaning cloth | Lint-free and safe for the cabinet finish | Low | Dry microfiber cloth if finish rules prohibit solvent |
| Measuring tape and cable clips | Route length plus clips sized for the actual cord | Low | Removable cord organizers rated for the finish |
Choose Between Wall Glow and Shelf Glow
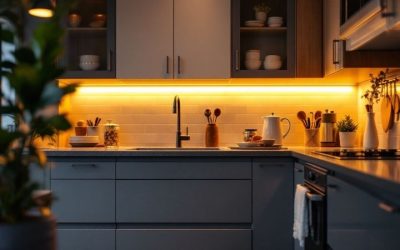
For an even halo, choose a rearward-facing location where the LEDs illuminate the wall instead of shining at your eyes. A stand positioned flush against a dark wall may produce a weaker effect than the same strip behind a cabinet with a little clearance. For an under-shelf installation, recess the strip behind the front lip so individual LED points are less visible when seated. The correct position depends on the furniture’s geometry, not a one-size-fits-all distance.
Think about what can interrupt the light. A rear support panel can cast a shadow across the wall; glass doors may reflect every diode; a glossy tabletop may reveal an exposed strip. On a cabinet with an electric fireplace insert, treat the heater housing and airflow path as off-limits unless the furniture and light makers explicitly approve the location. Decorative LED tape is not a substitute for a heater-approved accessory, and cabinet ventilation must remain clear.
Match the Strip, Controller, and Power Adapter
Start with a complete indoor kit whenever possible. LED tape, controller, connectors, and power adapter must be electrically and mechanically compatible; an adapter that happens to fit the plug is not automatically suitable. Some strips use USB power, while other systems use dedicated low-voltage adapters. Read the printed ratings and installation instructions for the exact model before routing the cord behind a closed cabinet, and do not substitute a random supply with an apparently similar connector.
Choose the control method to suit your routine. A simple inline switch can work for a stand that stays in one place, while app-controlled lighting may support schedules or scene changes. Philips Hue says compatible smart systems can offer room control and entertainment synchronization, but those features are not present in every strip kit [Philips Hue, guidance accessed October 2026]. Check whether any bridge, hub, or separate sync accessory is required rather than assuming that a phone-connected light changes colors with the TV picture.
Check the Finish and Prepare a Cable Exit
Adhesive performance depends on the actual surface. Sealed laminate and smooth painted finishes are generally easier to clean than raw timber, textured veneer, or dusty unfinished particleboard. A finish that is loose, heat-sensitive, or already peeling should not be used as the load-bearing surface for an adhesive-mounted strip. Check the console’s care instructions and test any cleaning method in a hidden area first. A solvent suitable for bare metal may harm furniture coatings.
Plan an accessible route for the controller and power brick before mounting the strip. Run cable toward an existing rear notch or open shelf, with slack for moving the cabinet during cleaning. Do not drill a new opening into a load-bearing panel or a television enclosure simply to hide wires. Removable clips can be useful on suitable finished surfaces; 3M publishes distinct preparation and removal directions for its Command cord organizers [3M, Command Cord Bundlers, accessed October 2026]. Follow the chosen clip’s instructions, not those of a different adhesive product.
How to Put LED Lights on a TV Stand Step by Step
This installation sequence works for a typical plug-in indoor strip kit on a stationary media cabinet. Keep the LEDs disconnected while positioning and fastening them, and use the manufacturer-supplied power equipment. Instructions for a specific strip or cabinet take precedence over the general sequence below; where the manual prohibits trimming, sharp bends, enclosed power supplies, or a particular surface, do not improvise around the prohibition.
Step 1: Mark the Light Route and Power End
With the television and game consoles in their normal positions, use painter’s tape to sketch the light path along the cabinet. Begin from the end nearest the intended outlet, not whichever corner is easiest to reach. Measure around actual edges rather than measuring only the cabinet width. Leave room for a controller and any connector that must remain outside a recessed groove. If the cabinet has a removable back panel, make sure the route will still work after that panel is reinstalled.
Stand or sit where you normally watch TV and check whether the proposed tape line will be visible. Move it farther behind a lip if a row of bright points appears in the sightline. If the stand is on legs, consider whether under-cabinet light will reflect from polished flooring or illuminate exposed cables. Making these adjustments before installation is much easier than lifting adhesive and trying to reattach it to a second surface.
Step 2: Connect the Kit Temporarily and Test It
Lay the strip on a clean, dry work surface without removing the adhesive liner. Join the strip, controller, and included power supply exactly as the kit diagram shows; then briefly power it to check that all sections illuminate and the intended controls respond. This is a test of operation, not permission to leave the strip powered while handling exposed contacts. Unplug it again before the next step, and examine the entire run for damaged insulation or visibly loose connectors.
If your lighting uses an app, confirm pairing and basic brightness control now while the controller is accessible. For products that require a bridge or a particular network band, follow that model’s onboarding process instead of guessing. A strip that flickers or shows the wrong colors during this dry run should be troubleshot before it is hidden behind furniture. Govee’s installation guidance similarly emphasizes preparing the location and testing the lights during setup [Govee, guide accessed October 2026].
Step 3: Clean, Dry, and Attach the Strip Gradually
Switch the strip off at its power source. Remove loose dust with a soft cloth; if the cabinet coating permits a cleaner, follow the adhesive maker’s and furniture maker’s directions and let the surface dry fully. For example, 3M’s VHB bonding guidance recommends an isopropyl-alcohol-and-water preparation for many compatible substrates but notes important exceptions [3M, surface-preparation guidance]. This industrial-tape recommendation does not mean alcohol is safe on every lacquer, veneer, or painted TV stand.
Start at the marked power end. Peel back a short section of the strip’s liner, align the tape to the planned line, and press that section into place using the pressure and waiting period required by the kit. Continue a manageable section at a time so the adhesive does not touch the wrong edge. Avoid pulling the strip tight over gaps, and do not force adhesive across screw heads or uneven seams. Where the finish will not hold tape reliably, switch to compatible clips or a suitable surface-mounted channel instead.
Step 4: Turn Corners Without Damaging the Strip
A media console often has a tight rear corner or a cross-support that interrupts a straight route. Make the turn only as allowed by the strip’s minimum bend radius or the manufacturer’s recommended mounting method. Do not sharply fold the LED circuit board onto itself or trap it beneath a bracket. On systems built for modular installation, a purpose-made corner connector may give a neater turn than bending the illuminated section around a square edge.
If the strip is too long, confirm that this exact version is designed to be cut. Philips Hue explains that approved models have designated cutting marks and that some versions are not cuttable or cannot reuse cut pieces [Philips Hue, strip-light guidance accessed October 2026]. Disconnect power, locate an approved mark, and follow the model’s cutting instructions; do not assume every RGB or addressable strip works like simple white LED tape. Cap or finish an exposed end only with approved materials if the manual requires them.
Step 5: Secure the Controller, Cord, and Power Brick
Mount the controller where its button, infrared receiver, or reset function can still be reached. Keep it clear of door swings and drawers; position a line-of-sight receiver so the cabinet will not block its remote signal. Guide the low-voltage lead through an existing cable opening, then retain slack with clips designed for the cord diameter. Let no connector carry the strip’s weight, and leave enough extra length to move the cabinet away from the wall for routine cleaning.
Place the adapter as its manufacturer directs, away from liquids, rugs, fabric piles, and enclosed spaces that could prevent cooling. The adapter should not be buried behind a powered heater or wedged under the TV’s stand foot. Look for appropriate safety certification when selecting electrical accessories: Electrical Safety Foundation International identifies marks from recognized labs such as UL, CSA, and Intertek as useful purchasing checks [ESFI, 2026]. A certification mark does not authorize a different output voltage or exceeding the kit’s stated capacity.
Step 6: Check the Glow and Make Final Adjustments
Restore power and test the lighting at the brightness you actually expect to use. Look at the stand from the sofa, from either end of the room, and with the television both on and off. A strong hot spot on the wall usually means the strip has shifted toward an exposed edge; a dark gap may indicate that a cabinet support is blocking the light. Make mounting adjustments only after disconnecting the strip, using replacement adhesive or clips as directed rather than repeatedly peeling and reusing weakened tape.
Open every cabinet door and drawer, confirm cords are not pinched, and check that ventilation openings remain unobstructed. If a strip flashes, becomes unusually hot, develops a damaged section, or produces an unexpected odor, disconnect it and contact the supplier rather than covering the issue with another layer of tape. After the final check, save the kit manual and adapter label information; those details will matter when replacing a controller or adding a compatible extension later.
Frequently Asked Questions
These additional questions concern powering, maintenance, and optional features after the physical installation is complete. They are worth checking before buying a replacement strip or adding a second lighting system.
Can I power TV stand LED lights from the TV’s USB port?
Only if the LED kit explicitly supports USB power and its electrical demand fits the television port’s published output. Some small strips are designed for USB, but many longer or brighter systems require their included wall adapter. A USB connector alone does not prove the television can safely supply what the strip needs. Check the TV and light manuals rather than relying on the shape of the plug.
Also decide whether you want the lights to switch off with the television. USB behavior differs by TV and by standby setting, and some ports remain energized when the screen is off. If synchronized power is a requirement, verify that behavior for your exact setup before buying; a separate listed adapter and controller may be the more reliable arrangement.
Will removing LED strip adhesive ruin a wood TV stand?
It can damage certain finishes, especially fragile veneer, fresh paint, or coatings already lifting at the edges. A manufacturer’s claim that a particular adhesive removes cleanly does not cover every furniture surface or every length of use. Bare unfinished wood can also hold onto adhesive residue more stubbornly than a smooth sealed finish.
For rental furniture or a valuable cabinet, test a small inconspicuous area, consider a removable mechanical channel if approved, and keep the light kit’s removal directions. Do not scrape the cabinet with a knife or flood the finish with solvent to dissolve tape. If the finish is uncertain, consult the furniture manufacturer before attaching anything permanent.
Why do LED strips change color or dim at the far end?
A noticeably dimmer far end may indicate a long run, inadequate power delivery, an incompatible extension, or a poor connection. Philips Hue lists power issues and voltage drop among possible causes of dim or flickering LED strips [Philips Hue, troubleshooting guidance accessed October 2026]. Do not assume an extra power brick can simply be connected to any point of the circuit.
Compare the installed length and extensions against your exact controller and adapter ratings. If connectors have come loose, disconnect power before inspecting them. For proprietary color-changing systems, use only the maker’s supported extension layout or ask its support team about approved expansion rather than mixing strips from unrelated kits.
Can the lights change color automatically with movies or games?
Yes, some systems support screen-reactive effects, but a standard RGB strip with an app is not necessarily one of them. Depending on the product, video synchronization may require a compatible camera, HDMI sync device, dedicated hub, or software connection. For example, Philips Hue lists extra sync equipment for its Play gradient entertainment lightstrips [Philips Hue, US product listing accessed October 2026].
Before purchasing, check whether the system supports your sources: a streaming app running directly on the TV may behave differently from a connected console or HDMI device. Also verify any resolution, copy-protection, or connection limitations in the manufacturer documentation. If you only want a steady warm-white halo, these extras may add complexity without improving the room’s basic lighting.
Final Thoughts
Learning how to put LED lights on a TV stand is mostly about careful placement and compatible components. Start with a measured, hidden route, test the kit before sticking it down, protect the cabinet finish, and keep the power gear accessible. Choose simple indirect light for a calm room and add smart effects only when your equipment supports them.