Key takeaways
- You can build a floating tv cabinet by assembling a rigid plywood case, reinforcing its rear mounting area, and securing a properly designed cleat to structural wall framing. The real challenge is not making a neat box. It is giving…
You can build a floating tv cabinet by assembling a rigid plywood case, reinforcing its rear mounting area, and securing a properly designed cleat to structural wall framing. The real challenge is not making a neat box. It is giving the finished cabinet, its electronics, and anything stored inside a reliable path back to the wall.
As an Amazon Associate we earn from qualifying purchases.
By KK Home Furnishings Editorial Team
Plan and Measure Your Floating TV Cabinet
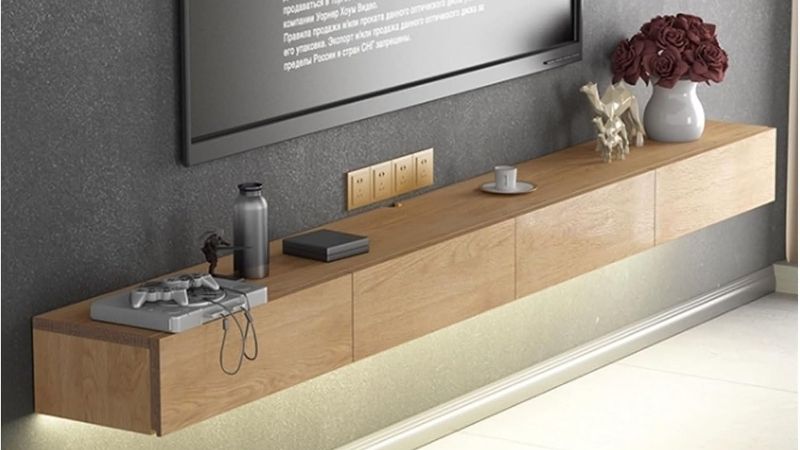
Start with a simple rectangular cabinet and a wall that can support it. The example below describes a 60-inch-wide, 14-inch-high, 15-inch-deep open-back plywood case; these are illustrative design dimensions, not a tested load rating or a universal fit. Final dimensions, joinery, cleat capacity, and fasteners must suit the actual wall and intended contents.
Choose a Buildable Size Around the Room, Not the Screen Diagonal
Measure the usable wall width, seated sightline, nearby doors, and any soundbar before drawing a cut list. A television’s advertised diagonal does not tell you how wide its feet are. For a TV sitting directly on the cabinet, the actual foot spacing, total TV weight, and a verified cabinet load capacity matter; a separately wall-mounted TV follows its own mount instructions.
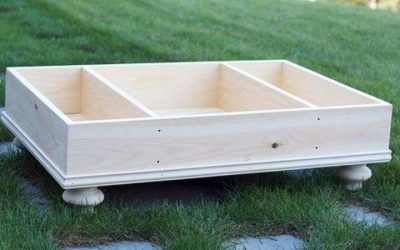
The 60-inch example has a top and bottom each 60 inches wide by 15 inches deep. With three-quarter-inch plywood, two sides and one center divider fit between those panels at 12.5 inches high. That is a worked layout for cutting, not a statement that every wall or plywood assembly will safely carry a particular television.
Decide How the Wall Will Carry the Cabinet
Find the studs or other verified structural backing before choosing the mounting system. A level French cleat attached to suitable framing spreads the connection across the back, while a strong upper cabinet rail transfers load into the case. Both halves, their joints, and the wall hardware must be appropriate for the complete loaded cabinet. Drywall by itself is not a substitute for that connection.
Wall-cabinet guidance from The Home Depot warns against hanging heavy cabinets solely from drywall; its installation method uses marked studs and purpose-made cabinet mounting screws. IKEA’s BESTÅ rail likewise calls for appropriate wall hardware and framing attachment, but that proprietary rail is not an automatic mounting solution for a homemade case. Seek a qualified installer for uncertain walls.
Plan Cable Access, Electronics Clearance, and the Finish
A mostly open back makes it easier to route HDMI and power leads to a properly installed wall outlet, but the upper and lower rear rails must remain intact. Before cutting an opening, check where studs, blocking, cleats, and electronic equipment will sit. Leave the airflow space required by each device’s manual; an attractive cabinet door should not trap a hot receiver.
Choose paint-grade plywood for an opaque finish or a furniture-grade veneer if the grain will show. Edge banding conceals the plywood plies, while a divider supports the long top and helps resist twisting. Dry-fit any door, hinge, or drawer option before finishing. This guide builds the suspended carcass; sliding-door mechanisms belong to a separate, specialized cabinet project.
| Material or Tool | Size or Spec | Cost Tier | Substitute |
|---|---|---|---|
| Cabinet plywood | Three-quarter-inch sheet goods for top, base, sides, and divider | Mid | Qualified cabinet-grade panels with verified joinery |
| Rear structural rails | Solid, well-attached upper and lower rails sized to fit between side panels | Low to mid | Engineered mounting backer specified by a cabinetmaker |
| Wall hanging system | Mating structural French cleats sized for the verified load and wall | Mid | Rated cabinet-hanging hardware approved for custom use |
| Wall fasteners | Cabinet or structural screws selected for framing, embedment, and load | Low to mid | Engineered masonry anchors for suitable solid masonry |
| Case joinery | Suitable wood glue, clamps, pilot holes, and screws for chosen plywood | Low to mid | Properly fitted dados or dowel joinery |
| Cutting and layout tools | Track or circular saw guide, square, stud finder, level, drill, eye protection | Mid to high | Square precut panels from a cabinet shop |
| Finish and cable fittings | Edge banding, primer or clear finish, grommets, and device-specific ventilation | Low to mid | Factory-finished plywood and exposed rear cable routing |
How to Build a Floating TV Cabinet Step by Step
Work on a flat bench before drilling the wall. This sequence builds a fixed, open-backed case and connects it to a matched cleat system; it does not supply a structural load certification. If you cannot identify the wall framing, verify the fasteners, or evaluate the wall’s condition, stop before installation and consult a qualified cabinet installer or contractor.
Step 1: Confirm the Wall and Draw the Full-Size Layout
Mark a level line at the proposed cabinet top and tape out its width and height. Check sightlines from the sofa, access to outlets, and clearance for doors or drawers. Use a stud finder as a starting point, then verify the actual framing by a suitable method before drilling. A stud finder alone does not establish a safe fastening location, and hidden pipes or electrical cables must be avoided.
Record exactly where the studs cross the future upper mounting rail. If a narrow cabinet misses the framing, do not compensate by adding more ordinary drywall anchors. A properly designed wall backer, different cabinet width, or professionally evaluated anchorage is a better response. Solid masonry needs hardware selected for that particular material; hollow block, brick veneer, and drywall are not interchangeable.
Measure the cabinet only after confirming a viable support path. The empty furniture weight is just the starting load: speakers, game consoles, books, doors, and objects set on top also count. Decide now whether the TV will mount independently to the wall. Never assume a homemade cabinet is suitable for supporting a television merely because its width looks generous.
Step 2: Cut the Plywood Panels and Label Their Edges
For the illustrative 60-inch-wide case, cut two panels measuring 60 by 15 inches for the top and base. Cut the two ends and middle divider to 12.5 by 15 inches if those vertical parts sit between the top and bottom. These dimensions come from the example design and must be redrawn when the board thickness, overall height, or joint style changes.
Use a straight guide and support the sheet on a suitable cutting surface so the offcut cannot drop unexpectedly. Mark the front edges of the panels before moving them. Lay everything dry on the bench and compare the diagonals of the case for squareness; a square, stable case is far easier to hang cleanly than one twisted by uneven cuts.
Inspect both faces and edges for voids, delamination, and damage, particularly near the rear mounting connection. Plywood grade and actual panel thickness vary. Do not rely on a nominal thickness to set a pocket-hole jig or fastener depth without checking the sheet in hand. If you are not comfortable making straight cuts, a shop-cut set of panels may be worth the expense.
Step 3: Assemble the Box and Reinforce the Load Path
Join the side panels between the top and bottom, then fit the center divider. A properly prepared dado joint can provide alignment; alternatively, compatible glue and screws or pocket-hole joinery may be used following the hardware maker’s directions. For three-quarter-inch stock, Kreg’s published pocket-hole guidance identifies 1.25-inch screws as a common pairing with the correct jig setup.
Clamp square, pilot-drill where appropriate, and avoid driving ordinary drywall screws into structural wood joints. Fit a substantial upper rail at the back, mechanically connected into the top, sides, and any relevant blocking or dividers. Add lower rear bracing so the cabinet does not rack. The hanging system must transfer its force into this connected structure, not merely into a thin decorative back panel.
Let the adhesive cure according to its manufacturer before any handling or loading. Test every joint by visual inspection and check for gaps or pulled fasteners. If the rail bends away from the body or the center divider does not contact both panels tightly, repair the assembly before proceeding. A clean front edge is cosmetic; the integrity of the rear support is not.
Step 4: Prepare a Matched Cleat and Dry-Fit the Cabinet
A traditional French cleat consists of matching bevel-cut members that interlock when the cabinet is lowered into place. Make the mating faces straight and free of splinters. Fit the cabinet-side cleat securely to the reinforced upper rear structure with fasteners and joint details selected for the intended loading. It should not depend on short screws driven only into a quarter-inch backer.
Use an offcut to test the bevel orientation before attaching the full-length members. The two parts must seat fully with their bearing surfaces engaged; a shallow contact line or a cleat prevented from settling by trim is a problem. Add a lower spacer or appropriately designed restraining connection to keep the cabinet level and prevent it from being lifted off accidentally.
Woodcraft’s workshop-cabinet examples show stud-secured, mating wall and cabinet cleats, together with spacers. They illustrate the mechanism, not a tested rating for your own furniture. A deeper or heavier cabinet increases the demands on the connections. If your design includes thick stone tops, heavy books, or a television resting above, have its structural support evaluated.
Step 5: Install the Wall Cleat Into Verified Structure
With the case temporarily supported elsewhere, transfer the cleat position onto the wall using its actual engagement depth rather than an assumed offset. Hold the wall member level and mark the confirmed structural fastening locations. Drill pilot holes to the fastener maker’s specifications, avoiding suspected wiring and plumbing. Fastener type, length, edge clearance, and quantity depend on the wall and loading.
Use purpose-appropriate structural or cabinet mounting screws into suitable wood framing, or a separately engineered anchoring solution for the identified masonry. A wood stud, metal stud partition, plaster-over-lath wall, and hollow masonry partition cannot be treated as equivalent. For heavy cabinetry, The Home Depot specifically cautions against relying solely on drywall, even when French cleats or toggles are discussed.
After fixing the wall cleat, recheck level and look for loose fasteners, crushed material, or a bowed strip. Do not shim a poorly secured rail by forcing the cabinet against it. If the wall is uneven, correct the support with compatible shimming and a verified connection. Structural performance belongs to the complete wall, screws, cleat, cabinet backer, and joint system together.
Step 6: Lift, Seat, and Secure the Cabinet Against Movement
Have another adult help lift the empty cabinet while the floor and work area remain clear. Engage the cabinet cleat fully with its wall mate, lower it into the seated position, and check that both ends touch their intended supports. Stand back to assess levelness, then use a level on the case itself rather than relying on the line you drew before installation.
Add the specified lower retaining fasteners or an approved anti-lift device where the design provides them. These prevent the body from being knocked upward or swung forward; the upper cleat alone should not be considered a complete system unless its installation specification expressly says so. Verify that doors or drawers cannot catch on an uneven wall or lever the case away when opened.
Do not conduct a homemade proof test by suddenly loading the shelf with a person, stacks of weights, or the television. Inspect support, then place the intended equipment only after the mounting arrangement has been judged appropriate for that combined load. Check for movement, cracking, or fastener loosening during early use and arrange professional correction if any appears.
Step 7: Finish Surfaces and Organize the Media Equipment
Apply edge banding to exposed plywood plies, fill visible fastener holes, and sand the surfaces to the finish manufacturer’s preparation instructions. Prime and paint, or apply a clear coating suited to the chosen veneer, allowing proper curing before loading the case. Finish both visible and concealed edges consistently enough to avoid obvious unfinished surfaces near shelves and openings.
Route power cords to an actual outlet without pinching them behind the cabinet. Do not run ordinary appliance or extension cords through concealed wall cavities; consult a licensed electrician for a properly located receptacle if the existing outlet is inaccessible. Keep HDMI and speaker connections accessible for replacement. Follow each device maker’s ventilation guidance instead of sealing an amplifier into a tight compartment.
Use the upper surface for modest accessories only when the completed, verified design allows them. For households with children, CPSC’s 2026 tip-over guidance recommends securing televisions and furniture; a TV standing on furniture needs its own proper restraint. A separately wall-mounted television requires a mount and structural installation independently suitable for that screen, even when the cabinet below looks coordinated.
Frequently Asked Questions
These decisions are easier to make before the first sheet is cut than after a finished case is hanging. The following questions address alternatives that can change the build method without replacing the main process above.
Can a floating TV cabinet be mounted on metal studs?
Sometimes, but the standard wood-stud screw arrangement does not automatically apply. Thin-gauge metal studs may need approved reinforcement, a different fastening method, or a professionally designed backing system. The safe answer depends on the partition’s construction and the weight and depth of the loaded cabinet, not simply on finding a stud location.
If you cannot access the framing to reinforce it, ask a qualified installer to identify a system with documented capacity for that wall. Avoid treating generic toggle-anchor package ratings as proof that a complete cantilevered media cabinet is suitable for the partition. Installation details are especially consequential where children may pull on a door or climb the case.
Do I need a solid back panel on a suspended media cabinet?
No, not in every design. An open-backed cabinet can provide generous cable and device access, but the case needs adequate bracing to resist racking. A full back can help square a cabinet, yet it does not by itself replace a structural mounting rail and correctly supported wall connection. Think of closure and structural attachment as separate functions.
If you add a thin plywood back for dust protection, arrange its edges and openings so equipment remains serviceable. Never fasten the entire hanging system only into thin back-panel material. A cabinetmaker may specify a thicker back, a hidden frame, or several support rails when unusual spans, drawer loads, or a different cabinet construction make that necessary.
How much open floor space should remain below the cabinet?
There is no single required gap that suits every room. The right distance depends on seated TV height, baseboards, cleaning tools, nearby furniture, and whether the television stands on the console or hangs independently. Mock up the cabinet position with painter’s tape and test your normal viewing position before committing to holes in the wall.
A higher gap looks lighter and may allow a vacuum or robot cleaner underneath, but it also raises the entire cabinet and anything placed on top. A lower installation can feel calmer in a media room yet limit practical cleaning access. Choose a viewing and maintenance arrangement first, then confirm that the chosen wall position allows safe structural anchorage.
Can MDF replace plywood in this project?
MDF can provide a smooth surface for painting, but substituting it for plywood changes fastener behavior, panel weight, joinery, and the way the hanging forces are resisted. A cut list and cleat connection developed for one panel product should not be assumed to work unchanged with another. MDF edges are also more vulnerable to damage from poor fastener placement or moisture exposure.
If a painted, seamless face is the priority, consider a plywood structural carcass with compatible applied finish panels rather than switching the entire load-bearing assembly without redesign. Any alternative sheet material needs manufacturer-supported fastening details and a suitable mounting design. The most economical board is not always the least expensive completed installation.
Final Thoughts
To build a floating tv cabinet successfully, keep the project centered on a square plywood case, a reinforced back, and a cleat anchored to verified wall structure. Let the actual TV, devices, and wall determine the final dimensions and connections. Good cable access and a clean finish matter, but neither can compensate for uncertain mounting support.